
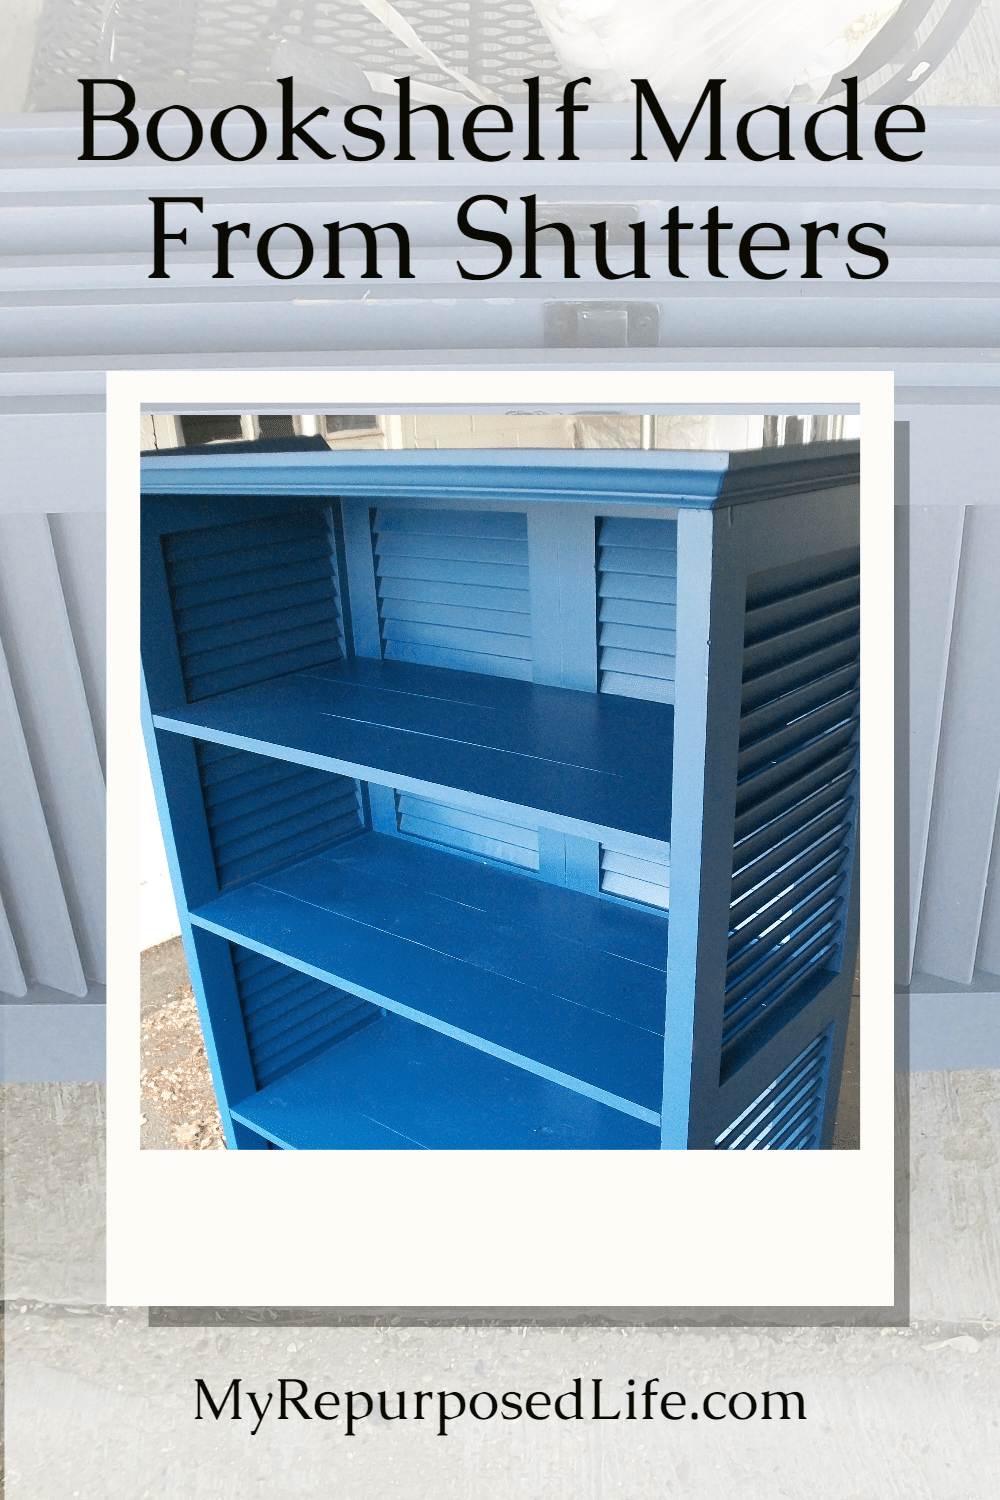
This repurposed shutters project was custom-made for a friend. Jan picked up these vintage shutters at our local Habitat for Humanity ReStore for $5.00 a PAIR. That is not typical of our ReStore.
Vintage shutters repurposed into an awesome bookshelf or bookcase. Who doesn't love a great shutter upcycle?
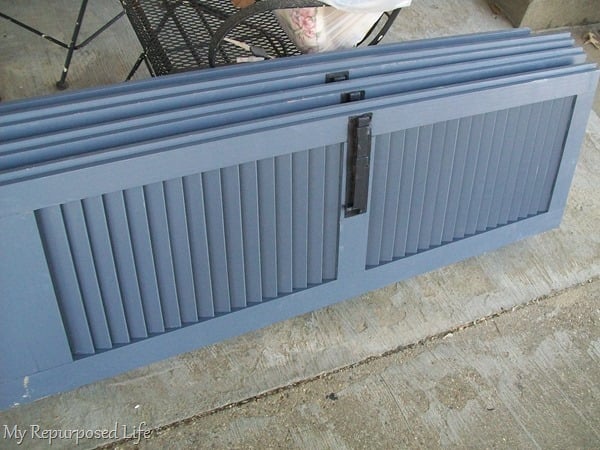
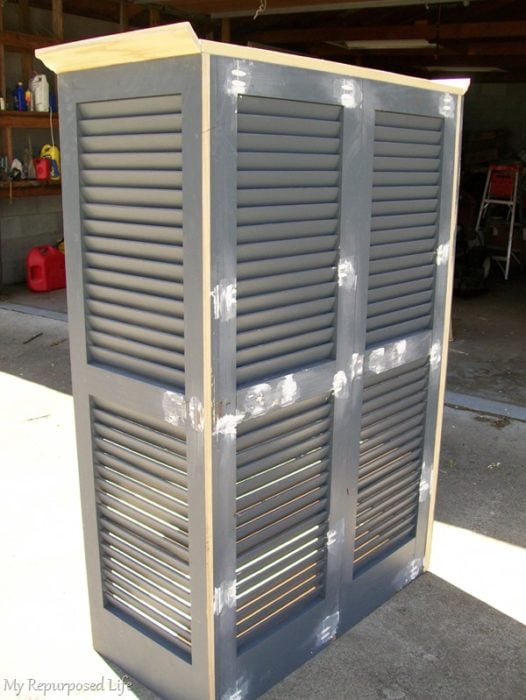
These are very nice, large, sturdy shutters.
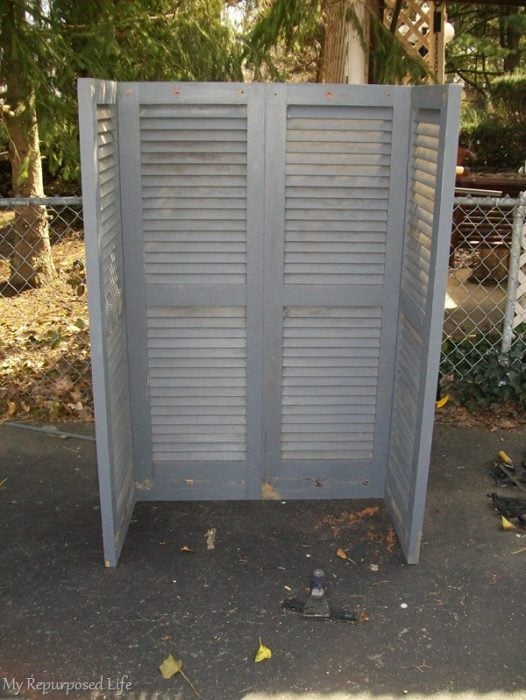
Designing the repurposed shutter shelf
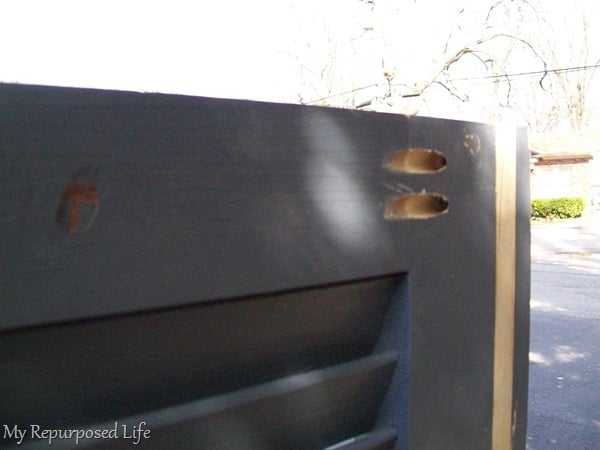
I had to rip a "ridge" off each shutter on the table saw to get them to fit together.
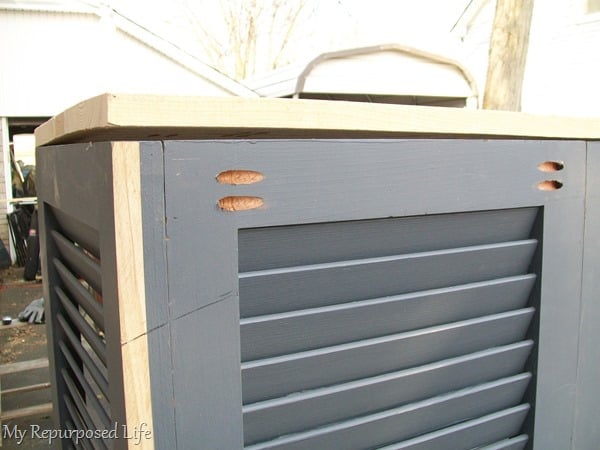
Connecting shutters using pocket hole joinery
I removed the black hinges and latches from the shutters. I used my Kreg Jig® R3 to make pocket holes to butt these two together in the back. Those pocket holes give a great (tight) joint. In case you don't know what the Kreg Jig Jr. looks like:
I also used the pocket holes to attach the sides to the back using pocket hole screws.
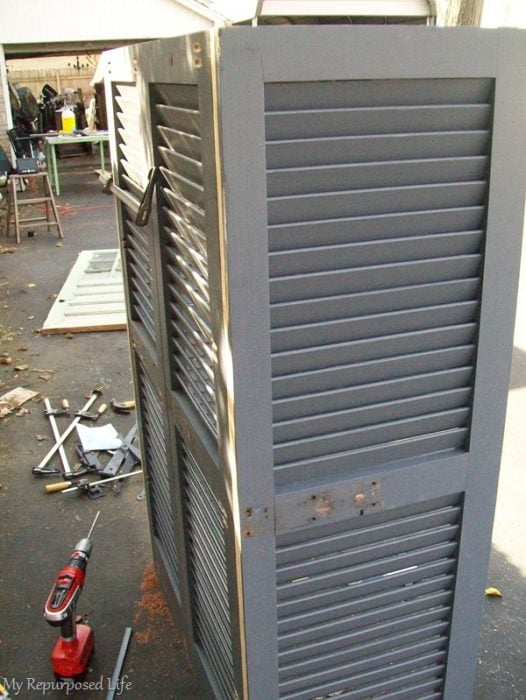
When I build, I rarely have a plan. I just sort of jump in. After I got the four shutters together, I realized I needed pocket holes to attach the top. That's where the portability of this jig comes in handy.
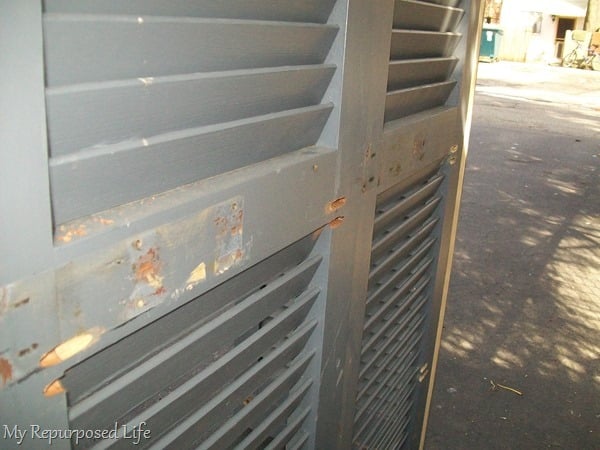
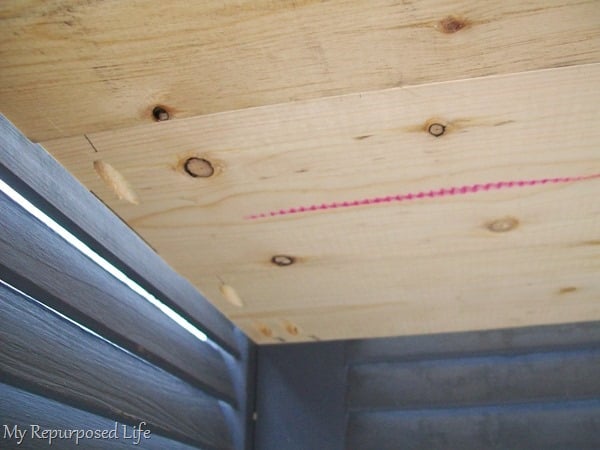
Even a warped top is no match for pocket hole screws
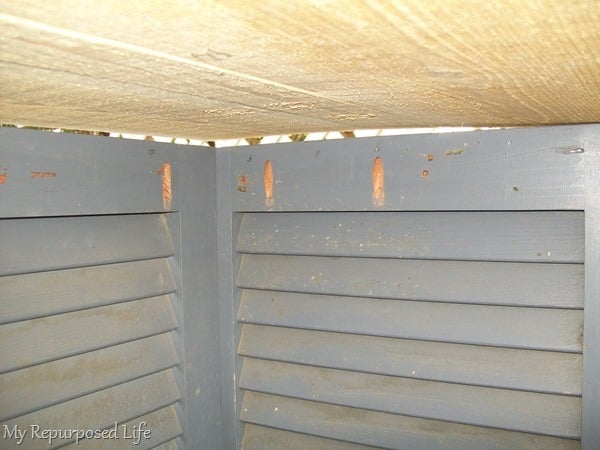
The rough-sawn lumber was a little uneven. Do you see the pocket holes? And the gap in the wood?
This is how it looked in the back.
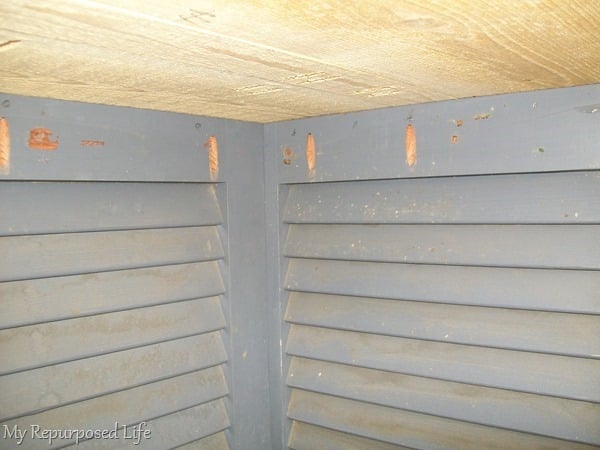
Voila! Screws are in, and they pulled the top right down.
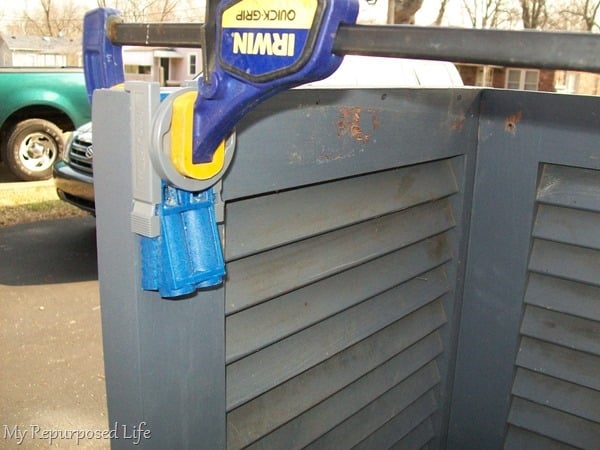
A quick clamp comes in handy when you work alone.
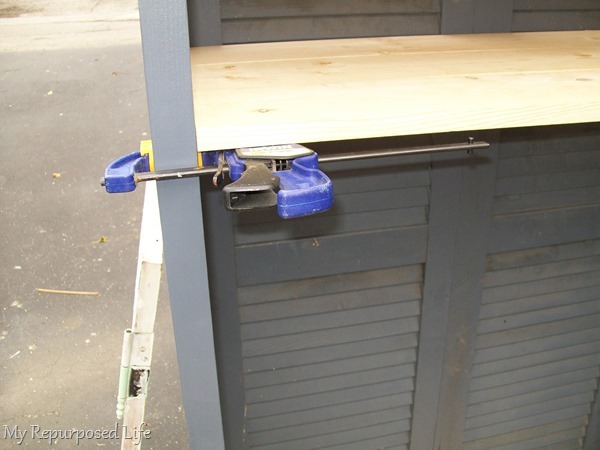
The shutter shelf comprises three 1x6s butted together with pocket holes to make three boards into one shelf. I found a new way to use my quick clamps![]()
![]() . It can be pretty challenging building alone. I could use an extra pair of hands sometimes.
. It can be pretty challenging building alone. I could use an extra pair of hands sometimes.
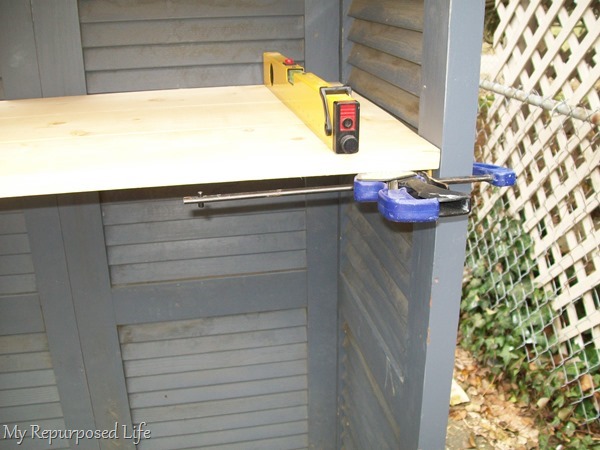
I made sure the shelf was level. The clamps were convenient to help hold the shelf in place. While the clamps held the shelf in place, I screwed the shelves to the shutters using pocket holes I drilled into the ends of each shelf. (If you don't have a Kreg Jig, you can use cleats to hold your shelves.)
How to attach shelves to repurposed shutters bookcase
In this picture, you can see the pocket hole that put the boards together, and in the back left corner, you can see that I used a double hole to attach the shelf to the back of the shutter.
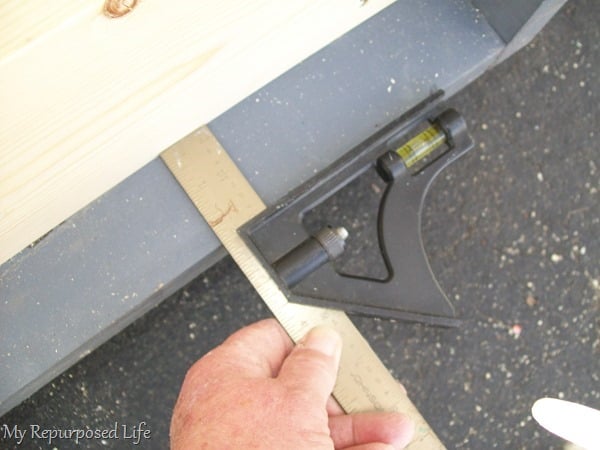
In this picture, I am getting ready to install the bottom shelf. I used this Combination Square![]() to make sure the shelf was the exact measurement all the way around. This is one of the handiest tools I have.
to make sure the shelf was the exact measurement all the way around. This is one of the handiest tools I have.
Fill visible pocket holes before painting.
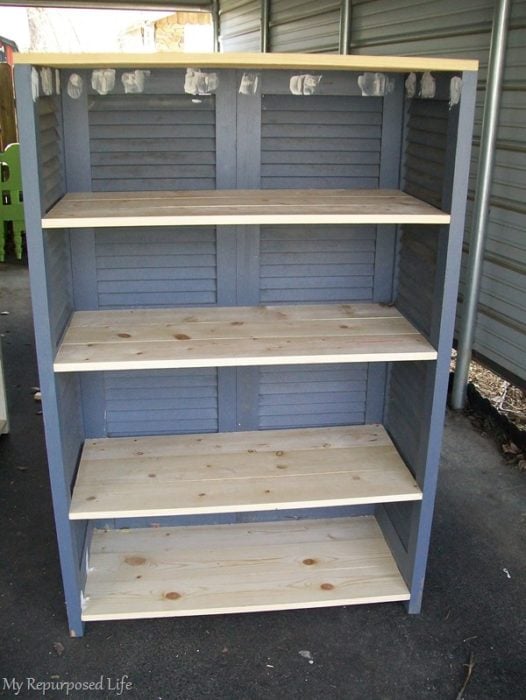
I filled all the (pocket) holes with spackling. The shelves are attached on the left front/back, middle, right back/front. The middle shelf is attached all around because the shutter is solid in the middle.
Add trim molding to the top of the bookcase.
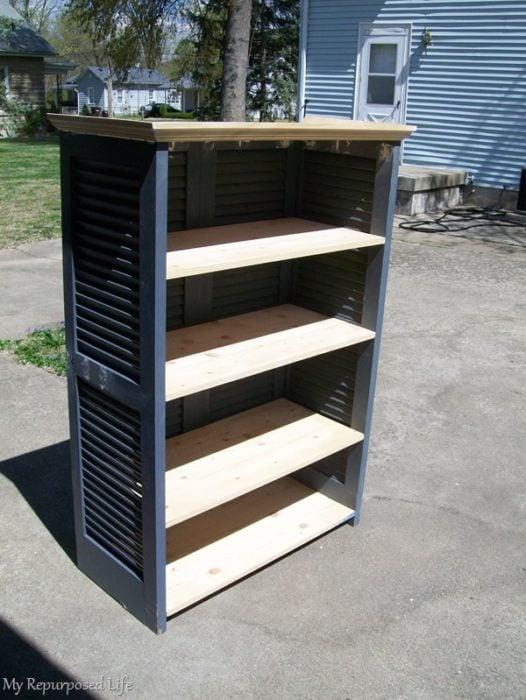
Here, you can see what I mean. Without the pocket holes, I would have had to make "cleats" to run around the bottom of all the shelves to "rest" on. I installed crown molding on the top.
Then, I sanded all the patching and prepared the bookshelf for painting. I used a paint sprayer. You will love using a Finish Max paint sprayer.
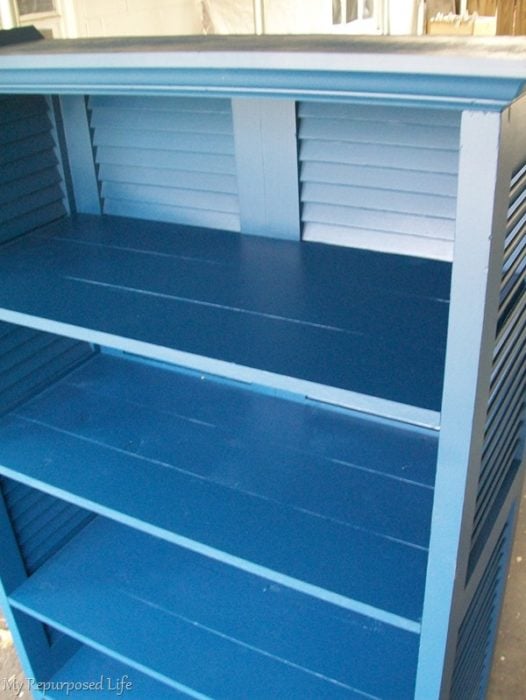
Blue Bookcase made from Upcycled Shutters
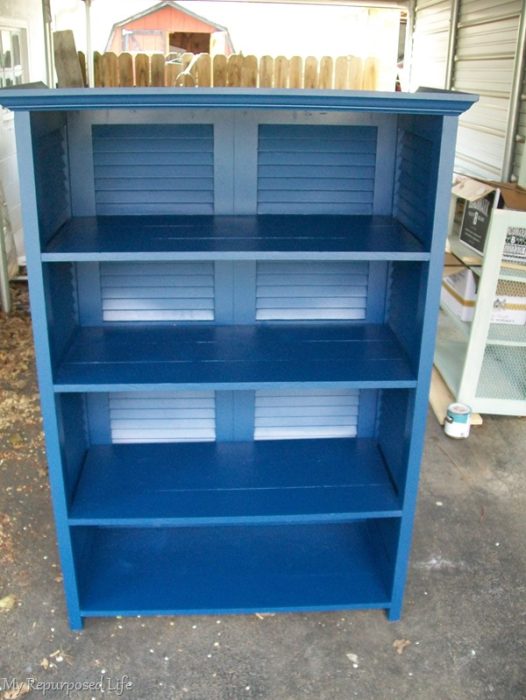
After many coats of paint.
Related Content: Navy Blue Furniture Projects
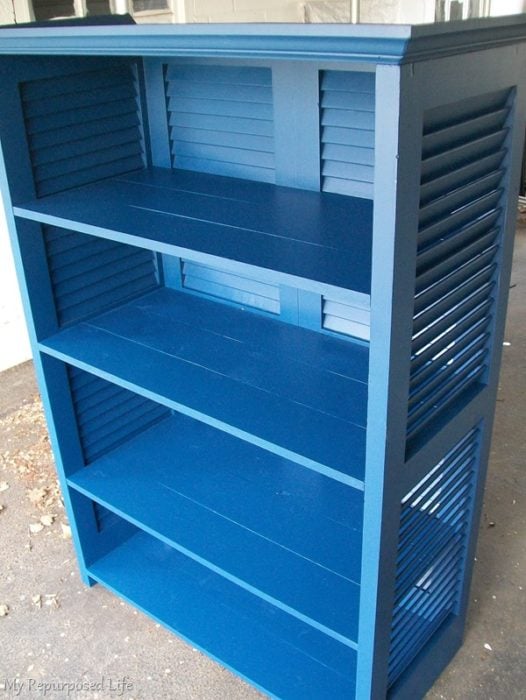
Jan chose a blue from Behr; I believe it's called Velvet Evening. Maybe you want to see Jan's other project, the door nightstand/bookshelf.
See other Shutter Projects on My Repurposed Life
Gail Wilson is the author and mastermind behind My Repurposed Life. She is obsessed with finding potential in unexpected places and believes that with a little hard work and imagination, any old thing can be made useful again, including herself!
Gail reinvented herself during a midlife crisis and has found purpose again. She hopes you will find new ideas for old things and pick up a few tools along the way.
Bonita Antczak
absolutely a great idea!!! I want to try it and see how it goes. Never enough storage=
great color you chose for your Shutter Shelving!!!!
thanks for sharing,
Bonni
Gail Wilson
Thanks Bonni! Good luck, have fun!
gail
Pedro Polena
Lovely book shelf !...and whith my favourite colour!!
Congratulations
Terri Hughes
wow...beautiful and I love the blue, very nice!
Gail Wilson
Thank you Terri! I appreciate you kind comment.
Hope you're having a productive week.
gail
Sharon
I am wanting to make this but I would like the back to be open. Do you think it would be sturdy enough without the back two shutters? I could build a 1x4 "box" for the top and bottom. BTW my Kreg jig and Harbour Freight and air compressor and sprayer are two of my favorite tools. I told my husband it sounded like I could have written this post. Ha lol.
gail@myrepurposedlife.com
Sharon,
I would think you would need to connect the shutters in the back, maybe at the top and bottom, and possibly below each shelf using some 1x4's? If it will actually be used for books, I would say that would be necessary to keep it squared. It may not be a problem if you're just going to use it for decor.
I'm happy you found My Repurposed Life, thanks for reaching out!
gail
Patty
Hi, would you mind telling me the hight of your finished bookcase? It is totally awesome and very professional looking. I have used a similar color blue on a drop-leaf table and loved the finished product.
Great job!
Marie
I love your website! You are very talented and love your work! You do make it look easy and you're very inspiring.
Look forward to seeing more great project and beautiful pieces!
girlfromwva
love the bookshelf! you did such a great job!
J K Reynolds
LOVE shutters, I have shutters in different ways all over my house. I can't seem to pass up; shutters, old doors or old windowsat any sale. Great job on the book case : )
Shelley
That looks awesome and with the shutter openings pointed upwards magazines could be hung there as well 🙂 Very nice job!!
Hope
These are super! A few questions... Do I have to use shutters for the back or could I use paintable thin plywood and just use the shutters for the sides? Will these be strong enough for books?
gail@myrepurposedlife.net
Hi, happy you stopped by and took the time to leave a comment.
These shutters were very sturdy, and I feel they are fine for making a book shelf. If you find some sturdy shutters, I think 1/2 inch plywood would be sufficient to support books.
good luck, have fun with your project
gail
Anonymous
That was a great idea it came out beutiful
Cariann
what a beautiful bookshelf... I'm saving the idea so when I move into my smaller office I can be inspired.
Jamie @ Sew Rockin'
Just wanted to let you know that I featured your project yesterday on "You Sew Rock Me Fridays!" Awesome job, I can't wait to see what you come up with next! 🙂
Here's the Link
Jamie @ sewrockin.com
Vivienne @ the V Spot
This is pure genius. I love it!!
emily @morefromthemoorefamily
OMG!! I am looking for a bookshelf for my bedroom and I can't find anything unique and lovely, this is BOTH! Thanks for the great idea!
Dorothy
Oh I love this. I've been eyeing the shutters at the resale shop, but never dreamed of doing something like this with them. I love it!
Pam
I love it! That is to neat.
Design-House.com
OK... this is just TOOO cute! I love it!!!!
Debra
DesignHouse Inc
http://www.design-house.com
Holly
I love this project - I have 2 sets of shutter sitting outside...I would love to do something like this. I love a lady who can work her tools!
Fundraising 4 Our Kids !!!
Please help, never did this before and have the items to do it with. My question is how you attached the shelf to the "cabinet" you made??? did you screw, hammer, or glue them into place. You stated "The shelf is made up of 3 1x6’s butted together with pocket holes in order to make 3 boards into one shelf. I found a new way to use my Quick Grip Clamps" but I don't understand... I see the holes you mention but I have not a clew how and what you mean... sorry... trying to recycle items I've found into treasures like you've made... 😀 Thanks for the encouragement. You do fantastic work!
Linda
Orting,WA.
please respond to: myfamilykbr@yahoo.com
Deborah
Love your shutter shelves!
My hubby and I made a shutter-shelving unit in the summer and I love it.
Come and check it out on my "talkin' trash post.
I painted them turquoise but am going to paint them again soon. 🙂
So nice to see a wider shelving unit..more storage!
Deborah
Anita @ GoingALittleCoastal
I think you've gotten your money's worth out of that jig! That turned out great. I love anything made out of shutters. This is a nice substantial piece. I'm sure she'll love it.
Lindy
Love your bookcase! It turned out great. Love the color, too!
Suzanne@Meridian Road
You'd never find anything half this cool in a furniture store! Great color, too.
Suzanne
Wow - I loved these step by step instructions!
Jan
My screen color must be off, cause in real life these shutters are a darker blue.
Debilou ~ Mississippi Mama
Hey Gail,, you are so creative. I love this shutter shelf. I dont like the blue color but its not mine so i guess that dont matter, huh? ha ha.. i really need to get one of those jig things and practice with it.
Cant wait for Jan to share some pics with us.
Reenie
Very cute!
Curtains In My Tree
I can use a hammer to hit something and that is the only tool i can use LOL
I am amaized that all these women out in blog land can do tools
Janice
Paige (Final Clothes-Out)
That looks great! I'm so impressed with how you can see "what could be" in stuff a lot of people would view as junk.
Also--you'll be proud. I finally bought a drill over the weekend. My first power tool!
Lesley Litrento
Great tutorial! Your posts are always so relevant to me. I really appreciate the details that you share. We all learn from each other! Thanks!
Lesley
thehomelessfinch.blogspot.com
Full Circle Creations
Great job Gail! It turned out great! I love my Kreg pocket hole jig too. But I also use a biscuit joiner and I love that too! It just depends on the application.
Great tutorial!
Holly
Jenn Erickson
Beautiful! Gail, you are very talented, and have me itching to try my hand at some creative woodworking this summer.
Jenn
driftwoodesign
Great shelfing Gail, I just may employ your use of shutters here. I picked up a few this past weekend and I have need of shelving on the deck. I'll be sure to let you know what happens. Do you make housecalls? *wink*
Kristy @ 4 the love of WOOD
Corn in my Coffee-Pot
Gail~
Wow! you did a great job on this project. So glad you showed us how you do it. Don't you just love those clamps? We've been using ours when working on the tin-can.
I would just imagine the sprayer was a tremendous help in get that shelf painted. Love the color and how it turned out.
Pat
Michell @Girl in Air
OMG! I love it! I just made a shutter bookshelf too but using a concrete form in the middle:-)
CountryBelle
Once again I am in awe Gail! That shelf (but in creamy white maybe) would be awesome for my living room!
Terri
Another AMAZING creation! I have been looking (at Re-store, in fact) for some used shutters to make a headboard. No luck yet, but I will keep looking!
You sound like you are truly "in love" with your paint sprayer. I have seen some that are recommended but they have all been about $1000, yikes. I don't suppose yours is a little more affordable?
Proper Prim
You aced another one Gail. I love anything made from shutters and Jan sure hit the mother load getting them so cheap. You did a fantastic job on that. Love that little jig too... I hardly do a project without it.
Our Re store is so expensive, I can buy things new sometimes cheaper than I can buy them there.
Hope you are having a great week.
Hugs, Deb
Korrie@RedHenHome
I am in awe of your building talent. Your latest project is a wonder, and I LOVE the fun color!
Jamie
Beautiful shelf! We bought the Kreg jig to use when the hubby and I were building our kitchen cabinets and doors - it's now a staple tool that we use VERY frequently around here. I would love to see some helpful hints on how you get your crown moulding cut and fit so well - something I have never managed to get quite right on my own.
Debbie
You're a genious. When is YOUR book coming out! Ideas AND skill. Marvelous. I love the way this turned out. Unfortunately I rarely see any shutters that are in any kind of condition to keep. Most around here are plastic.
Great bookcase!
PicturePerfectPixies
I learn so much from you! Thanks for sharing.
It turned out beautiful!
Rose @ Confessions of a Curbshopaholic
It's even better than I had pictured it. The blue looks great, though I bet it was awful to paint even with a sprayer. Shutters are so difficult.
Another way to join the 1x's would be to use a biscuit joiner..something I DO have and don't think of using enough. Though I still think I need a pocket hole jig too!
Sharon @ Elizabeth & Co.
What a great bookshelf! And a nicely detailed tutorial too. Well done! ... Do you have a paint sprayer recommendation?
Sharon @ Elizabeth & Co.
What a great bookshelf! And a nicely detailed tutorial too. Well done! ... Do you have a paint sprayer recommendation?
Dawn
I love, love, love watching you do projects like this - though I still know I couldn't put that together if someone held a gun to my head... maybe I think if I keep watching you making pocket holes and using the clamps as an extra person, I will suddenly know how to do it one day, LOL. (in my dreams, hehe) Great shelving unit - I adore it - you rock!
Ellen
YOU are SOOOOOOOOO talented! I'm jealous!
Denise
Fabulous job! I am doing one of my features on your project this morning!
Denise
Extreme Personal Measures
Coleen's Corner
You make it look so easy! I know how difficult it is to put things like that together... sometimes 4 hands around here aren't enough! I love things made from shutters. But that's one thing I rarely see around here. Another great piece - it's fabulous!
Home Made Quilts By Granny
That is outstanding. I like the color don't think I would be able to let her have it...I'd have to keep it. Trish
Granny
The shutter bookshelf looks great. I love the details you put into your work. It looks very professional. That color of blue is so pretty. I'm gonna have to find something to paint that color.