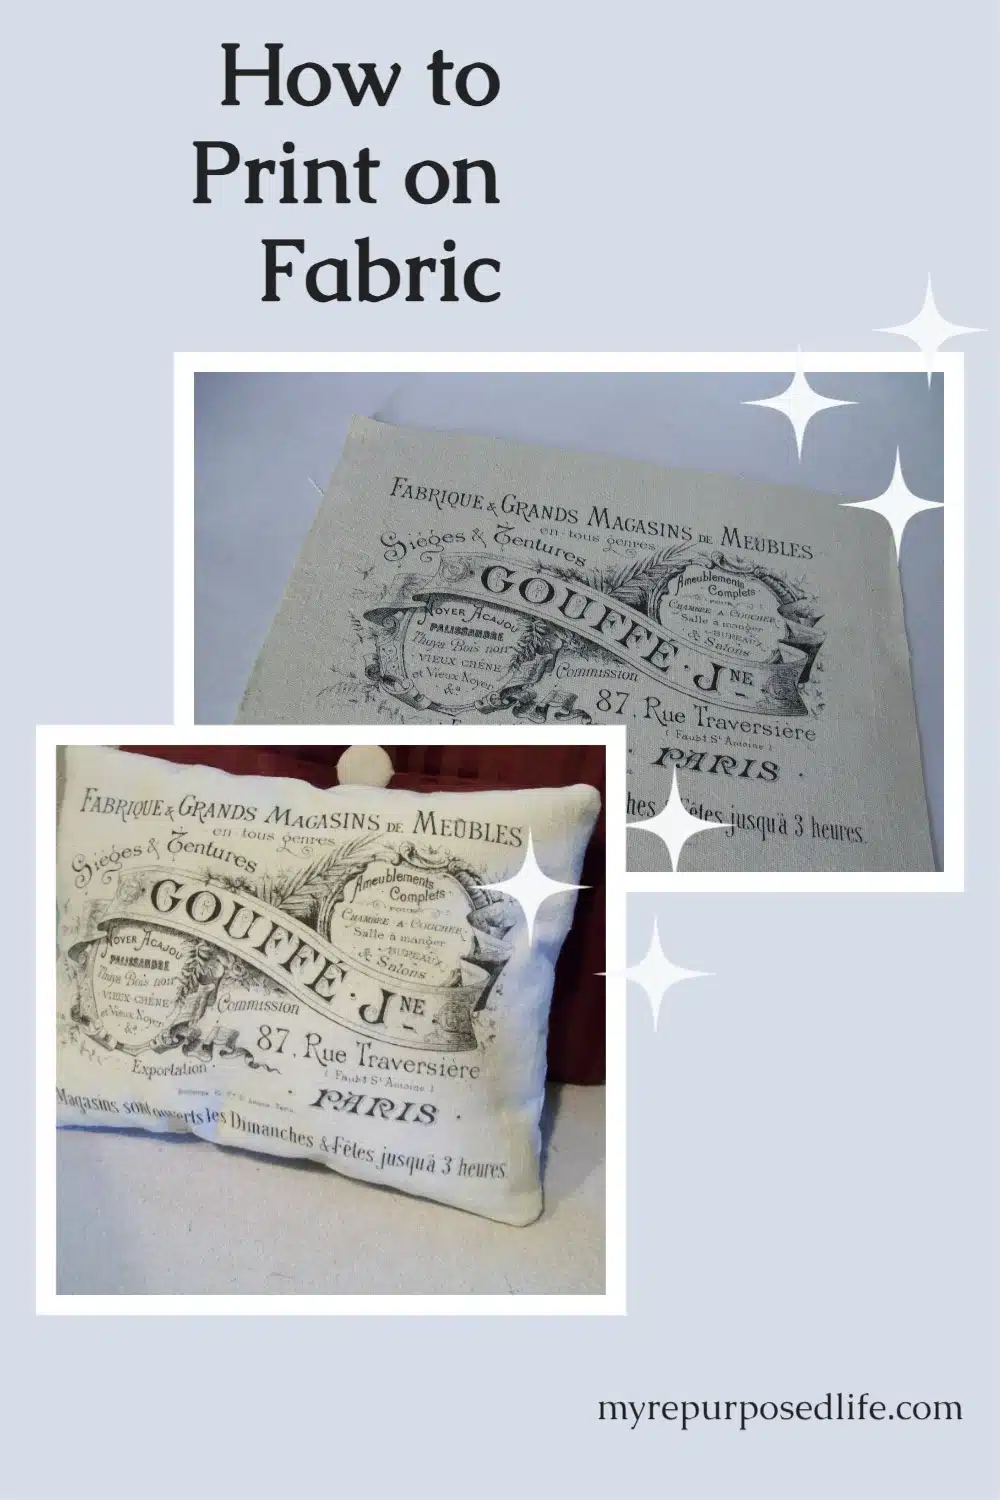
Have you wondered about printing on fabric using your home printer? It is pretty easy. First, let me tell you that I do NOT recommend that you put fabric through your high dollar, fantabulous printer. I have an old INKJET printer that I was about to retire. It seemed like the perfect time to figure out how to print on fabric.

Have you ever noticed these labels![]() when you’re shopping for return address labels? They are full sheets. You can tell I have had these for years. I got them from someone when I was still teaching. For this printing on fabric project I used these labels in addition to some leftover drop cloth fabric. I peeled the backing off the label, and put the sticky label directly on the fabric. Then, I carefully cut the fabric out even with the label. I say carefully, because I didn’t want the drop cloth fabric fraying. Something tells me that my printer would not want a bunch of strings invading it.
when you’re shopping for return address labels? They are full sheets. You can tell I have had these for years. I got them from someone when I was still teaching. For this printing on fabric project I used these labels in addition to some leftover drop cloth fabric. I peeled the backing off the label, and put the sticky label directly on the fabric. Then, I carefully cut the fabric out even with the label. I say carefully, because I didn’t want the drop cloth fabric fraying. Something tells me that my printer would not want a bunch of strings invading it.
Apply fabric to full sheet label
I got my graphics at The Graphics Fairy. If you don’t visit there on a regular basis, you’re really missing out on some great images! I am a follower, so I don’t miss a single post! This is not the regular home for my printer. But because I was trying to get it to play nice with my laptop I brought it into the living room and set it on the coffee table.
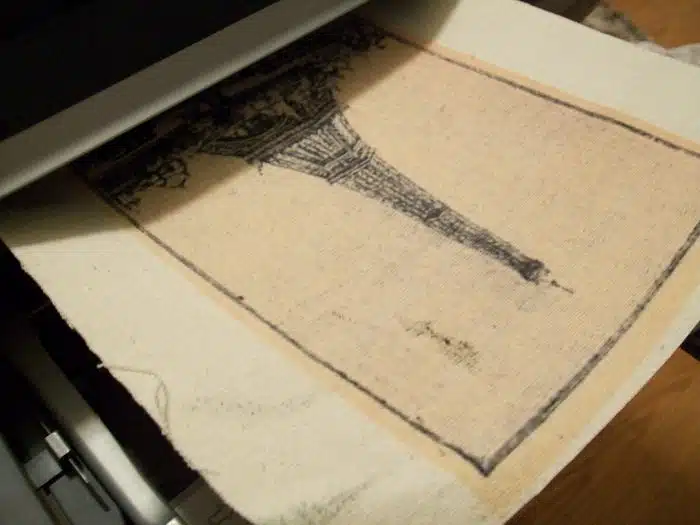
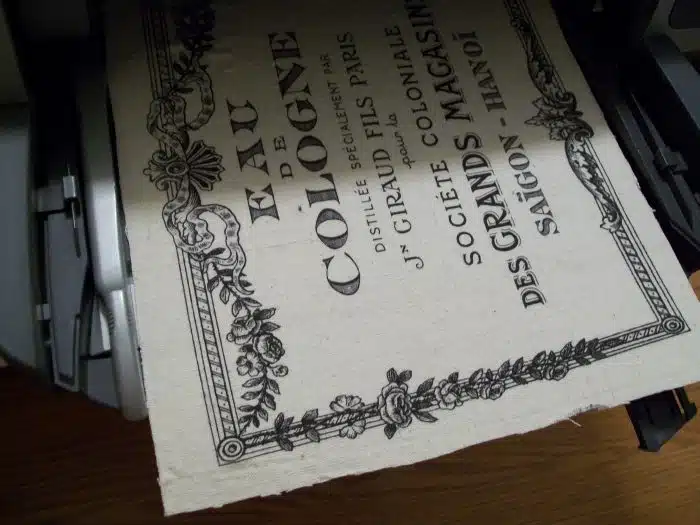
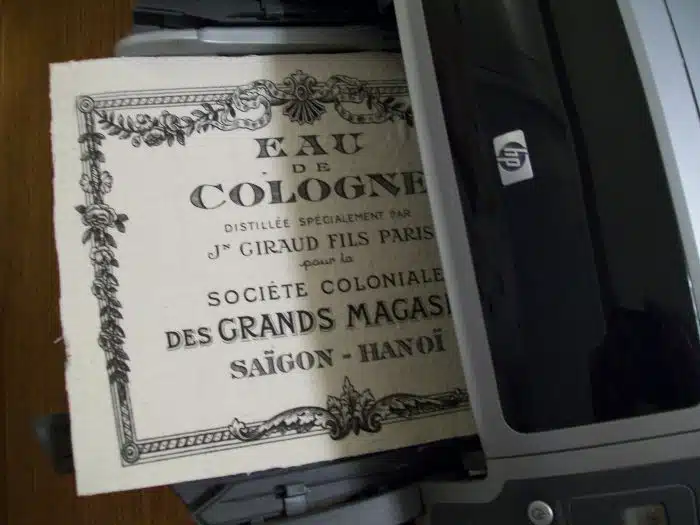
Carefully feed the fabric and the label sheet through printer
You can see that the ink smudged a little in the corner. Since I was sitting right on the couch while it was printing, I was able to see that it miss-fed slightly and fixed it. But it still smudged. Adds to it’s character, right?
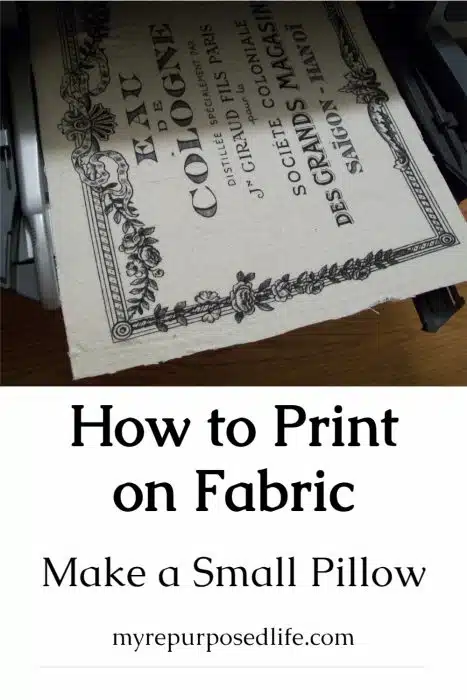
Image printed on fabric using label paper
This shows the image still attached to the paper.
I put some Fray Check around the outside edge of the “frame” on the image. After the Fray Check dried I purposely frayed the edges to get a soft edge. I haven’t decided what I’m doing with this one yet.
Printing on fabric with graphics
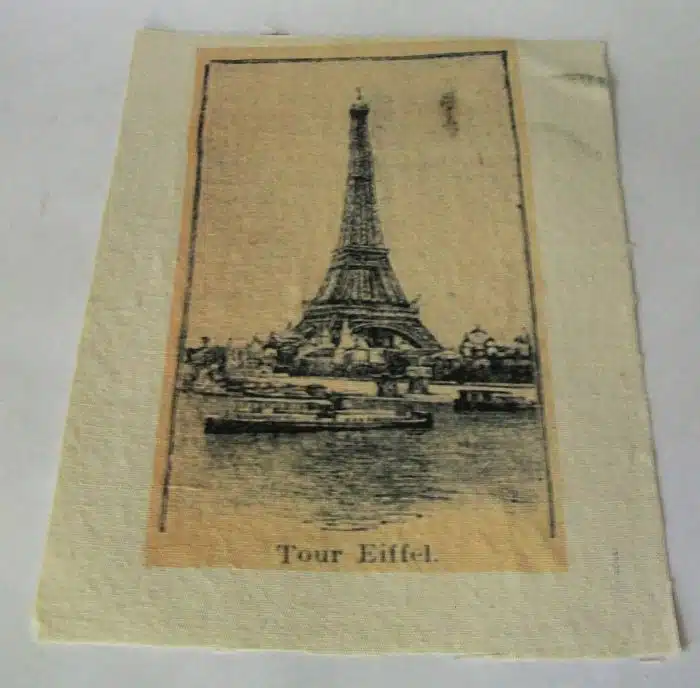
This is another graphic I got at The Graphics Fairy.
I’m not sure why I love everything French, but I do!
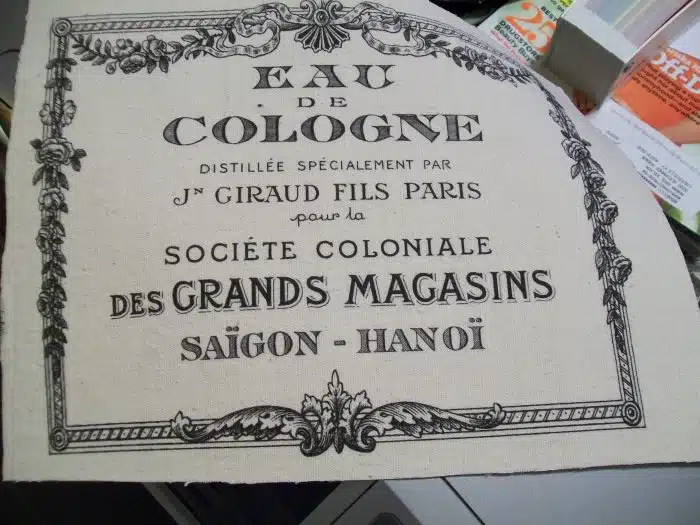
I love the way the image looks on the drop cloth fabric!

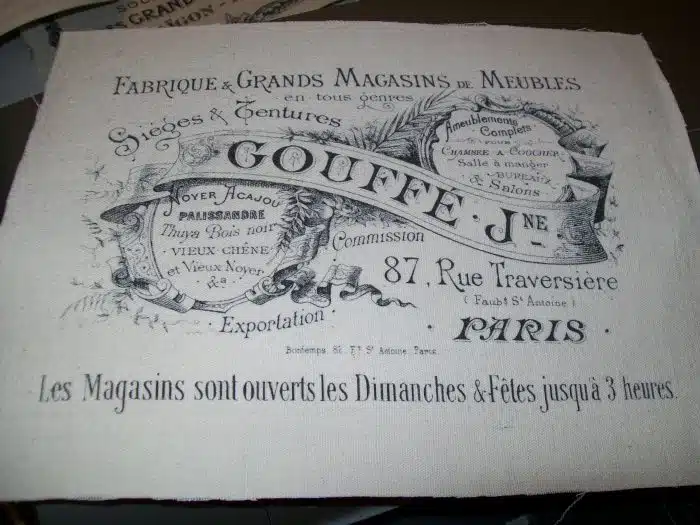
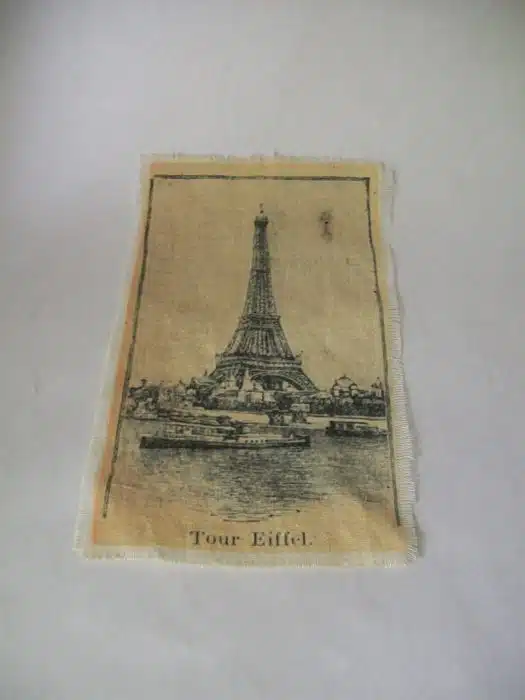
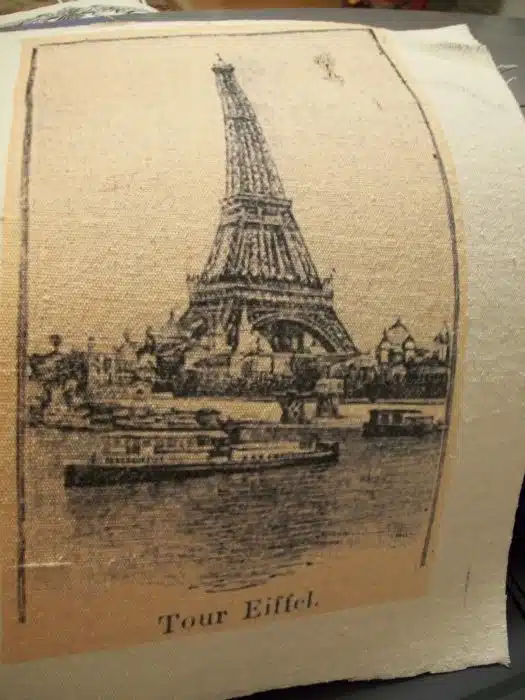
Another! I’m sure there are friends out there that know what these say. I, of course have NO idea! This image here.
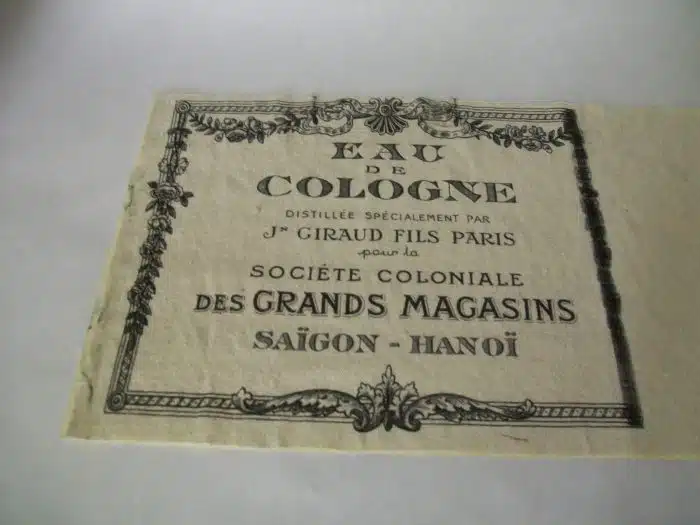
This was the first image I printed. Something happened there on the right. That was the last edge to come out of the printer. I’m not exactly sure why that happened. I think if I frame it, that part won’t show.
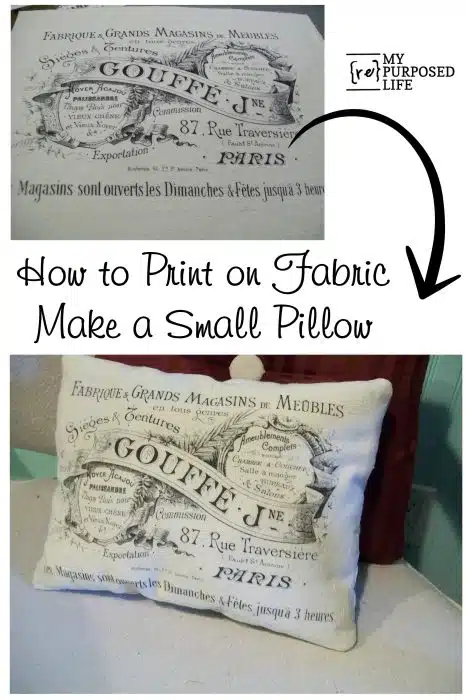
So, there you have it! My way of printing on fabric. I printed all my images out as 8x10 images. I did this in case I decide to frame them.
EDITED TO ADD:
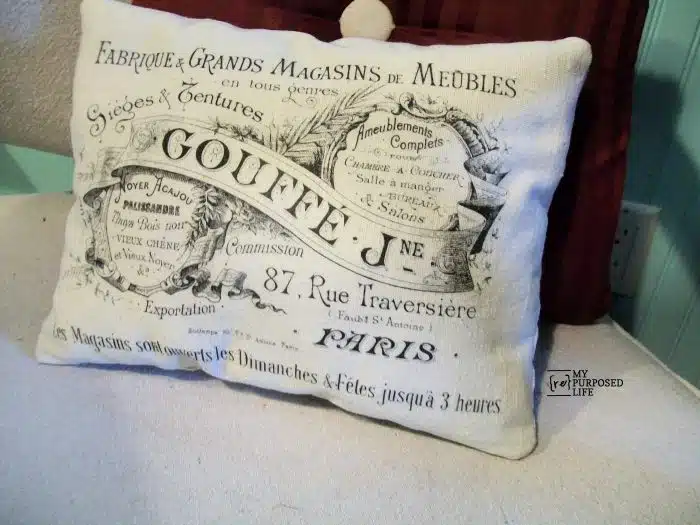
I made a small pillow out of one of the images I printed.
Like this idea of printing on fabric? I also printed on bead board wallpaper. You can see how printed on fabric washes and holds up in the dryer.
My friend Susan from Homeroad made Cute Little Pillows, be sure and check them out too!

related content: Print Vintage Christmas Images and More
gail
I got this from Kate on Facebook. To make it washable, there's an easy 2 step process that will "fix" the ink. You use Bubble Jet Set 2000 prior to printing and Bubble Jet Wash after printing. I used it and it does work.
Gail Wilson is the author and mastermind behind My Repurposed Life. She is obsessed with finding potential in unexpected places and believes that with a little hard work and imagination, any old thing can be made useful again, including herself!
Gail reinvented herself during a midlife crisis and has found purpose again. She hopes you will find new ideas for old things and pick up a few tools along the way.
Kathy A
Great tutorial. I haven't had the courage to try printing on cloth--yet. I love making dollhouse miniatures and have seen some "Persian" rug pictures that I would just love to try! One of these days....
Gail Wilson
Kathy
Wow! Printing a "persian rug picture on fabric as a rug for a dollhouse is brilliant! Good luck, I hope you do it someday. You could probably ask around and find a friend ar family member who is getting a new printer and wants to get rid of an old one. 🙂
gail
Shelly B
How fun!! Not sure I can chance fabric in my printer... Yet.😃 And I kept reading & looking, hmm. Then I realized that the sticker paper is for stability, and that you run it through, paper side down! (Or whichever way you orient your paper for printing.) In this case, face the fabric toward side to be printed on, and the paper is the "blank" side.
Lol!
Gail Wilson
Shelly,
Indeed! I'm so sorry to have confused you. 🙂
good luck!
gail
Diane Burton
Hi Gail,
I love all the things you do! You have given me all kinds of interesting things to try! So I thought I would share a little something with you.
Love the images on your cushion! I have been doing this for years so I had to share a little secret with you. I use waxed paper on the back of my fabric. Just iron it to the fabric and you can print anything you want. ( It is probably a lot cheaper than buying lazer labels)
I have made photo cushions and photo comforters from them as well. Just group pictures together in a collage to fit each page, stitch them together and make it whatever size you want! If you want to get really daring you can use one photo and crop it into sections so that you can enlarge it to what you want.
You have given me so many great ideas I just had to share.
Thanks!
Gail Wilson
Diane,
What a great tip! Thank you so much for your oh so kind comment. I truly appreciate it when my "friends" share tips with us!
gail
Lisa
So basically you are using the sticky sheet to ‘hold the fabric stiff enough to send it through the printer? Then once out, you peel away the sticky sheet below & the top of the fabric is then printed.
Gail Wilson
Lisa,
Yes, that is correct, but please read Diane's comment on how she uses wax paper! genius!
gail
Roman Makarenko
Thanks for the tut! I’ve been wondering how to do this. P.S. I adore the graphics fairy!
Gail Wilson
You're welcome! Have fun, good luck!
gail
Linda at Mixed Kreations
That is so cool, and beautiful pillow. I have a extra printer I replaced with a new one because it only printed when it felt like it. Lol. Would like to try this if I could get the printer to communicate with my laptop.
Gail Wilson
Silly electronics! They can be so helpful when they communicate with each other! 🙂
good luck! keep me posted.
gail
Susan Homeroad Stevenson
Ha! Yes, it certainly does work! I did a post back in 2011 where I used the "sticker paper" and ran it through the printer. I was amazed it worked. I actually made the exact same little pillow from the Graphic Fairy too! We must think alike! Have a great day!
Gail Wilson
hehehe this is a post from 2010. I thought it was time to re-share it. 😉
I love those graphics from Karen @The Graphic Fairy!
gail
karen Fritz
Hello,
I've been printing on fabric for about 3 years. I soak my muslin in the bubble jet set and let it dry. I then iron it onto butcher paper shiny side against fabric. I make it a bit larger than the copy paper size so I can cut it with sharp scissors to get a clean edge. It goes thru the printer well but I let it sit over night to set the ink. I sell my pillows so they have to have a set ink or else it will run. I was very surprised you were able to use a heavy drop cloth. I will try this and see what I get. If I'm, able to print on a heavier fabric that will save me a lot of steps.
Thank you
Gail Wilson
Thanks for all of your tips/advice Karen! Good luck with the drop cloth material.
gail
Lesa
I bought some church pews to put in my funeral home but they’re covered in are a red velvet fabric and I was wondering if the material could be painted so I don’t have to replace it! Can you help me please?
Gail Wilson
Lesa,
I know that people have painted velvet fabric. I tried and was unsuccessful.
You can see how a friend of mine did it here: https://themagicbrushinc.com/paintingvelvet/
wishing you lots of luck!
gail
Hollyflower
Wow! Printing fabric from paper ink-jet printer. This is amazing. 🙂
Rosepeace
I have been watching some art and quilting shows and you just gave me a great idea for doing some of this art on a piece of fabric. You could print it onto the fabric and if you want it to be permanent, use a permanent pen to enhance the image of just use it to draw the image a little darker. You could also use a sewing machine to stitch over the image on the lines with thread as the permanent image that is left as it washes out the original image. Just be careful to "draw" the entire image with the thread.
In addition, if you are looking to create a colored image, you can dilute acrylic paints and paint the image. By diluting the paint it makes it soft for the fabric application. I would test on separate pieces of fabricc different dilutions in order to arrive at both the color and the softness of the fabric. Believe me, if you get acrylic paint on fabric, it is PERMANENT!! To set it you can use an iron, I would use a pressing cloth or a piece of paper over it to protect your iron from any possible transfer of the paint!
Gail Wilson
Fabulous suggestions to take this project up a level! Thanks for sharing your ideas--I truly appreciate it.
gail
Amy
So excited to find this!!! I do a lot of projects with mod podge on glass and it's hard to find certain fabrics that my customers are looking for. I just a did run and not only did it print but it didn't smudge with the glue. You just helped me find a way to complete 2 of my customer's projects. Looks like I'll be hitting JoAnn's tomorrow to buy some more white fabric to print on - thank you!!!
Gail Wilson
Amy,
I'm so happy you found this tutorial helpful!!! Thanks for stopping by and letting me know it worked for you.
Have fun!
gail
Sarah Lategan
is there any way to fix the ink so that the product can be washed?
Gail Wilson
I haven't found a way, but washed on gentle, the image shouldn't fade too much.
gail
Kirstie G
Wowzers, you've just saved my life. Such a great idea and one I'd never thought of.
I just thought I'd share because I had a slight dilemma on how to print on fabric 30cm x 30cm (12" x 12").
So I cut my label sheet in half and adhered both the A4 size and the 1/2-A4 on the back of the fabric, therefor making a 30x30 sized label.
My printer doesn't take bigger than A4, so I folded the 1/2-A4 over and adhered both labels together with double sided tape. It then fed through like a dream.
Again, thanks for the idea. The possibilities are endless!
Gail Wilson
Woohoo! Kirstie, I'm so glad you found a "work around" for what you needed! Thanks for letting us know what worked for you.
gail
Sharron Connabeer
I'm guessing you printed onto the fabric and not the sticky label? It's not clear if you printed on the label or not? Sorry if I am confused.
Gail Wilson
Sharron,
The label is simply to allow the fabric to go through the printer. After the fabric came out of the printer, I simply removed the sticky label.
I hope that helps.
gail
Susanne
That is amazing!!! I promise not to hold you responsible if I mess up my printer 😉
Chris
I did not see if you stated you peeled the paper off the printed fabric?
Gail Wilson
The paper is solely to allow the drop cloth to have some stiffness. I removed it as soon as the ink dried.
Rose
Me too, I'm cunfused?
Rebecca
Thank you so much for sharing this. I need to give this a go myself and this is an excellent tutorial. I have linked to it on my own blog post "Ten Fun Ways to Make Marks on Fabric". Thanks again! http://www.blueradish.com.au/ten-fun-ways-to-make-marks-on-fabric/
Kathy
Gail, thank you so much for your post! I tried it today on my Brother laser printer and it worked fabulously! To answer the questions I see that some people have asked, I used a "full page" self-adhesive label, as Gail did. I peeled off the back of the label, and smoothed a thin piece of cotton fabric across the sticky side of the label. Then I cut the edges of the fabric to the size of the paper making sure there were no loose threads to catch in the machine. I printed on the fabric side. The whole thing went right through my printer very smoothly. After printing, I separated the fabric from the label. It came out perfectly and the colors look great! It is probably not waterproof and probably should not be washed. But it will be great for a Halloween costume that I am working on for one of my children. Gail, I can't thank you enough for your wonderful suggestion and helpful tips.
gail@myrepurposedlife.com
I'm so happy you found my tutorial helpful Kathy. Thanks so much for taking the time to leave a comment on this post.
Thanks for sharing how it worked for you. 🙂
gail
Nataly
I have also done this with a laser printer but with freezer paper. Half the time it came out perfect but the other half the times, when I tried to remove the fabric from the freezer paper, some of the ink scattered to the sides because of the static electricity that was created when tearing them apart I guess. Does anyone know how to fix this?
(you can see my result at napaea_crafts on instagram)
Nataly
I fixed this! There has to be humidity in your indoor air for this to work well! So better do it in the summer instead of winter.
R NARESH REDY
it was very nice to know how to print designs on cloth with really no difficult techniques. i am in a shock when i used ur first technique to print one of my daughters drawing on her t shirt, she was so exited & showed it to all her friends
gail@myrepurposedlife.com
fun! I'm happy you found my tutorial useful.
thanks for your comment.
gail
sandie t
Hi Gail,
Nothing intriques me more than printing on fabric. I have used the spray method, the wax paper method, now I have some fabric on a roll from JoAnn Fabrics on hold, sitting with my other print supplies ready to try.. I think I just may be inept. Now I have your method which ALL i n theoryshould work. I have a pretty good ink jet printer that I cannot seem to find instructions for. I am not satisfied with the quality of the color when I try to print a colored piece The instruction book would probably help. Those little intense arrows don't seem to help. Did you use the drop cloth from Lowes. I think it is pretty thick. And does the color come out well on the fabric? I really appreciate your sharing your information, and I am a new follower, I think--I signed for a newsletter, is that the same, I know I will enjoy your site. thank you so much,
a passionate and dedicated printer user,--I am also on pinterest.com/taptopdesigns
sandie.
gail@myrepurposedlife.com
Sandie
I used a drop cloth from Home Depot, I like them the best. I did another project in color, you can see it here. https://www.myrepurposedlife.com/2013/12/how-to-print-on-fabric-with-canon-pixma-mg-7120-printer.html
have fun!
gail
Maria
Sandie, re your printer and instruction manual. Google the brand name (example enter: epson (your printer brand) printer manual in the google search box. The printers website will come up and from within the site, search 'manual' for your model number. There are different websites that will offer the manual, but in my experience (trust me, don't ask me how I know) go to the official (your printer manufacturer) website. Hope this helps.
Lady Denise Coy
Bravo to you!!! Thannk you so very much. You know how you type in some simple seach and Google or whoever gives you MILLIONS of choices, well, sometimes I just give up. I found you right away. I have a vast collection, four generations worth, of all kinds of ephemera. I'm dying to take some of my original art work and transfer to fabric. Thank you for leading me in the correct direction. I know why you love all things French. They may be a bit snobby but in the end they are , well, eau de Chic. Well thats what I think and agree. Sincerely with gratitude, Lady Denise Coy
gail@myrepurposedlife.com
Denise,
Thank you so much for letting me know how you found me. I always wonder the road people travel to arrive here.
Wishing you lots of luck, won't it be difficult to choose "where" to start with so many choices?
gail
wendy
Hi there!
I really want to try this but I am confused. Maybe I am missing a step.... you stick the label to the fabric, then run it through the printer. then what? Do you peel off the label and the image stays?
thank you!
Kelley
Sure wish this would have been answered as I am just as confused.???
sweetb
Same here Kelly... I don't get how the label ended up looking like fabric? :-/ Would be great if you could answer this Gail?????
gail@myrepurposedlife.com
Hey there!
The answer is in the post itself. I have put the text in bold so that future visitors will understand that I applied the label to the fabric in order to stiffen it so that it would feed through the printer.
I hope this clears it up for you.
Thanks for stopping by My Repurposed Life!
gail
Maria
Ladies, the paper label is the 'back' of the fabric, to stiffen the fabric so it will run through the printer. You print on the fabric side, so be careful how you place the fabric on the tray to print. In my case, I have to put my paper 'print side down' (the side that will be printed on) on the tray, so when it comes out, the printed side is on top.
Allison Dey Malacaria
But then, after printing, do you peel the label off or do you have to soak it off or leave it on? No one says what to do with the label after printing.
gail@myrepurposedlife.com
Allison,
The label is simply to stiffen up the fabric to allow it to pass through the printer. 🙂
gail
Allison Dey Malacaria
I understand that. But there's nothing that says what to do with the label AFTER printing. Does it remain attached to the paper or does it get peeled off or soaked off? I know this question has been asked several times with no answer. Humour me. LOL We're all Aspergers or borderline in my family. I need very specific steps. 🙂
Maria
I see the confusion ladies. Once the label backed fabric goes through the printer (and the ink is dry), you just peel the label off. It's only there to make sure the fabric feeds through the printer rollers. Have fun 🙂
cathy
Love the idea but I'm having problems finding fabric or transfers of dinosaurs to make a quilt for my grandson. I found two books with great photos prehistoric world by Paul Harrison I'd love to use for my quilt.What is the best way to transfer these photos to fabric.Any suggestionoh your photo of lasagna covers the whole right side of my tablet.Maybe not a good place for adds.thank you.
gail@myrepurposedlife.com
Thanks for reaching out to me. I do not know of a way to print on fabric to make it washable. I used my newest printer to print some awesome images here: https://www.myrepurposedlife.com/2013/12/how-to-print-on-fabric-with-canon-pixma-mg-7120-printer.html
But unless treated some way, I wouldn't recommend washing.
As for the ads, I do not have control over placement. You are correct, an ad for lasagna over the right side would make it difficult. As a site owner, there are so many variables for devices these days, there is no wonder why my site looks different for people on any given device. Generally there is an X to click on (my experience)
If it weren't for those ads, My Repurposed Life would not have been there for you to find this tutorial. keeping a large site up and running is not cheap these days. Lots of overhead costs. 🙂 I hope that explains why there are ads on 99% of all websites in the world. It is sort of like watching t.v. You get free shows, but have to suffer through commercials. No commercials on cable t.v. shows (hbo, showtime, etc) but you have to pay to watch them.
I really can't think of a way to get those pictures onto the quilt other than scanning and printing. There are photo transfer methods available, but because the images are in a book, I'm assuming they have print on the back, and that may make it difficult to transfer.
Perhaps you could find some line drawing images of dinosaurs, trace those images onto fabric and then use a paint marker to make them permanent.
That's about all I have... sorry I couldn't be more help.
gail
tammcd
Scan and print is fairly simple. Scan the pages from the book into your computer, using the scanner on your printer. Make sure the resolution is around 300 dots per inch (DPI). Once you have the file saved in .jpg form, you can open it and print it using your graphics program - the one you use for printing anything.
If you don't have a scanner, you can take your book to a copy shop and use theirs to do the scanning, then bring the digital files home to download onto your computer from a DVD or flash drive. It's important to note that there is an issue with copyrighted images, some copy shops will not let you scan or copy copyrighted material. Otherwise, follow the steps above to print any image onto fabric
Ms. V
Hi, I thought I knew some cool transfer tricks, but this is really cool. I use a plain piece of copy/typewriter paper, small box, spray adhesive or glue, fabric cut to size of paper. Works beautifully (my favorite). Now I will try labels as well. Thanks 🙂
murielle
Hi Gail !
first of all i discovered your blog with this post and what you do is smart and i fell in love with the "louvered door hall tree"
about what is written (i'm french btw) the first one says " eau de cologne (is a kind of fragrance-lotion) distilled by (name) by the colonial society of Saigon Hanoî( vietnam was french at this time)
the second one says factory and big shop of furnitures in all kinds seats and curtains in the middle the name Gouffé , on the left all sorts of wood used , right names of the furnitures and at the bottom " the shops are opened sunday and public holidays till 3 pm
hope it helped 😉
Karen
Just when I thought I knew all the ways to transfer a graphic and found my favorite way. I love this!! I love that you and the printer are speaking again. My sewing machine is moody, sometimes it doesn't communicate with me either, nor I with it. Definitely pinning this!
Kimberly
Oh my gosh! This is the most awesome thing! I just tried this using a drop cloth tacked by glue stick to a sheet of copy paper. Worked like a charm! I can't believe how easy it was! Thank you so much for the great ideas! Can't even describe how excited I am! Now I can do all the French labels on pillows that I have been wanting without the crazy prices! Thank you! Thank you! Thank you!
gail@myrepurposedlife.net
So happy you found this tutorial! I love to inspire and help others to be creative! Thank you for your sweet comment to let me know you found My Repurposed Life
gail
Sherry Ramsey
Hi I wanted to tell you that I iron my fabric to freezer paper then run it thru the printer. It isn't as thick as the sticker paper and no worries about it jamming and the smudges. There is also a liquid that you can soak your fabric with that makes the images permanent and they won't fade if you use it. You put your fabric in it and then let it dry, then print, then there is another solution to make it permanent (and not fade) that you soak it in and let dry.
gail@myrepurposedlife.net
Sherry,
Thanks for stopping by and taking the time to leave a great comment with a lot of useful information. I really appreciate it!
gail
Ms. V
Hi Sherry, what is the name of the liquid?
tru leigh
I wanted a small design printed on fabric, so i took a piece of muslin, tacked it onto a piece of printer paper with a glue stick, and sent it through the printer. Worked great. Iron the muslin first. Not the best method for something you want to wash as I think the ink will fade.
Kirsten
I took a small piece of muslin, use a glue stick to tack it to regular piece of printer paper and ran it thru my inkjet printer. Worked like a charm. Just make sure the fabric is ironed flat.
angie
I am interested in making family quilts for my children...how long does it take to do the photo?? and wonder what kinds of printers are we talking about..and does it matter what kind of material?? Do I scan the picture onto the material and print??So interested but wondering if there is step by step...first time and so excited
RustyBaby
You can also iron your muslin to butchers paper and it will adhere, once printed, peel it off. I have done photos for quilts this way and it works great!
Anonymous
I have just tried this on a patterned fabric and it worked brilliantly, thanks so much. My head is in a spin with ideas of personalizing with names etc for my grandchildren.
Christine @ Let's Get Crafty!
Hi Gail!
I was wondering if the fabric you used was actual drop cloths from Home Depot and whether you washed them first?
Love it!
Marilyn D.
I still would like to know if the ink rubs off and how you would clean it? It does look fantastic
Doris Price
Thanks for a wonderfull "Find" your "Blog" via "The Graphics Fairy" via "This Artists Journey".
I love this Tutorial and your pics sure help and I'm going to share with my FB friends/family about your Blog. I am now a traveling companion:-) I will be checking out more from your blog.
Blessings,Doris Price
QueenK
STOP... can I recommend not putting fabric through a printer with any frayed edges or loose threads as they get caught in the rollers.
I have been selling and using Printable Fabrics for 10 years and I wouldnt want anyone to have a ba experience the 1st or they wont want to do it again.
Printing on fabrics is so much fun you can produce amazing unique projects.
Cheers, Kathleen
http://www.printablefabrics.com.au
MaryE
OMG!! how wonderful this project is. I think my old printer is still in the garage (along with enough items to furnish another house) I might try to fix it and use it to try this (I don't think my husband would be happy for me to use our/his brand new HP. baby. Thank you for this. Mary x
Handbags*N*Pigtails
Im going to start calling you Gail-Create-a-lot(like the care bears of old). You're amazing!
LambAround
This is just about the neatest thing ever! Now I know how to make the fabric design that I want...I just need to learn to sew! Ooh, or be very nice to my sewing hubby 🙂
JesPlayin
Hi! Love your blog and can't wait to look through it. I have a couple of suggestions on this project. You can use freezer paper instead of the labels (definitely cheaper). You cut the freezer paper to the same size as the paper and attach the shiny plastic-y side tp the fabric. Ironing it together causes the plastic to stick to the paper, but you can still peel off with no problem when it cools down. There's also a great product called Bubble Jet Set 2000 that you can use to make your print wash-fast. You pre-soak the fabric in that and let dry then print on it. Hope this helps someone.
Happy Crafting!
Michelle @Shellsshabbyshack
Awesome! I'm definitely going to try this! I just saw a French Script pillow at a high end store for $56. I love this tute because I think I can make one for less than $5. I follow The Graphics Fairy, also. Good stuff! I like the way you and Jeanine did it! xx
Anne
omygosh. itworked great-- thanks again for the idea!
Anne
thank you! i tried printing on some linen a while back, and had hit or jammed results... can't wait to try the label method... great blog!
Kiley
So thankful I clicked on this post. I've been ironing freezer paper to fabric for printing. Using sticky labels would save me time...and time is money :o) !!!
Really enjoy your posts!!! Gotcha linked to my blog!
Mrs. Limestone
I absolutely love that last pillow. But Im totally confused on the label sticker had anything to do with it. Why would putting a label behind the fabric help feed it thru the printer? (I would think making it thicker would make it more difficult) Sorry if Im being thick here.
bellaluna
Love this pillow, great job and thanks for sharing.
PetraB
wonderful cushions, thank you for the tutorial
Kara
Love the pillow!! What a creative and GREAT way to make something new on the cheap!
Kathy @ Creative Home Expressions
Turned out great and I love the pillow! I think when I try this I will be doing it a similar, if not the same, way.
Karen- The Graphics Fairy
Oh my gosh!!! You and Jeanine are both geniuses!! Jeanine, for coming up with the technique, which I had seen on her blog. And you, for trying this out on drop cloth!!! I'm so excited, you have no idea how much I love canvas drop cloth fabric, I can't wait to try this! Thank you so much Gail, for linking this up to Brag Monday. Oh ... and your pillow is gorgeous too!
Feathers and Flight
This is Lovely!!! Thank you for Sharing your
" How to" as Well! I am Excited to add you to my Blog List! Thank You!
Have a Wonderful Day!
~Jill~
Edie Schmidt
I am going to try this one! Great job! Wonderful project!
Anita @ GoingALittleCoastal
I still have not tried this but I will! I think this would be so much fun and you can do so much. I love the way the pillow turned out.
Lou
Hi Gail... Just stopping by from BragMonday at the Graphics Fairy... love, love, love your little pillow.
I, too, have a love of Frenchy-things. (Especially those of the male species... had a boyfriend of the French kind for a while... mmm... but enough of that!)
I recently ordered (via FleaBay) some vintage magazine ads from France. They are gorgeous. Now I just have to find the right frames for them- hoping to do a set of 9 in a grid- layout. I'll have to scan the ads in and submit them to the GFairy!
My mum has printed on fabric transfer a number of times- there's a product you buy to put through the printer, then transfer it to the fabric after. My nephew has also (for his final art project) printed photos and transferred these to fabric by some 'wash' method too. Seems to be a few ways to get around this fabric-printing obsession.
cheerio, Lou (from Sydney, Oz)
Jacqueline
I hopped over from Gnee at Singing with Birds. You were on her top 5 and i agree, this is really a great idea and I love the Graphic Fairy and all of her beautiful art. I am going to try this! Thanks a ton!!
gnee @ Singing With Birds
Congratulations, your printing project made this week's Top 5 Hits on Singing With Birds. Come check it out, grab a button and have a great weekend!
Heather Bredimus
Hi Gail! I found your site off of Today’s Creative Blog! I love your craft! You are so talented! I just signed up to be your newest follower! Woo hoo! I hope you stop by my new blog. I just started it 2 months ago and would love new friends! Please come see me at http://www.modernfamilymagazine.com
-Heather-
junesummer
I've tryed this on 2 printers but just keep getting paper jam....so frustrating, any suggestions?
Regina Moore
Wonderful idea! I'm gonna try it!
Humble Housekeeping
Wow! That is the coolest thing I have seen in a while! Great job and great tutorial!
The Covered Porch
Fabulous idea! Love it!
Joselyn
This is incredible! Your pillow reminds me of the pillows I saw at Harrods. Have a look: http://www.thediyspot.com/wp-content/uploads/2010/08/Harrods-pillows_0729.jpg/
Lindy
I have to think of some way to use this process, soon! Love your little pillow!
L.
Patty B.
Have you tried ironing fabric to the shiny side of freezer paper? It sticks well enough to send it through the printer.
Betsy@My Salvaged Treasures
Excellent idea! I just sold an old printer at a yard sale a few months ago, oh well. Lots of possibilities with this idea. Thanks for sharing.
Pam @ diy Design Fanatic
Fantastic!!!You could definitely sell these!
Embellished Bayou
What an awesome project, thanks for sharing! I may just get brave enough to try this someday.
Pieced Pastimes
Thanks for this wonderful tutorial. I have been wanting to make some vintage printed pillows on burlap and this will work out perfectly. TFS.
Proper Prim
Gail I can't believe I missed this post yesterday... I never miss one of your posts. Wow am I glad I found it today though. I love those prints... I have wondered how to print on cloth... thanks so much for posting this. Everything looks fabulous.
Hugs, Deb
Jan @ bobbypins boardwalk
Gail, that gives the fabric a much more authentic look, than the iron-ons that I've been using. Great idea!
Homemade Quilts by Granny
Wow I would never have thought to put fabric in a printer....thanks. Trish
Mary Lou
I also do the card stock and spray adhesive technique but it isn't washable....Don't use it for pillows...
★All Thingz Related★
I've been wanting to try this! They turned out great!
And yes, it was a bit cooler today in the far western part of the state, Thank goodness!!
{Rebekah}
So...Look What I Made
Very pretty but how would it hold up to washing? Would you need to set the ink with an iron maybe?
random.heather
COOOOOOLLLL! I really like this!
Ms Bingles Vintage Christmas
Oh, I love it!
It really came out nice!
Thank you for sharing!
Leticia
Cassie @ Primitive & Proper
gail this is so cool. i don't even have a printer, but after seeing this, i think i might need one. you and one cheap b*tch have me convince today that i need a printer.
Cassie @ Primitive & Proper
gail this is so cool. i don't even have a printer, but after seeing this, i think i might need one. you and one cheap b*tch have me convince today that i need a printer.
Julie (Legacy Crafter)
really cool stuff there. I'll have to try that myself
One Cheap B*tch
I love how you did it too! Very clever and the frayed edging - why didn't I think of that? Brilliant!
Jeanine
Paige (Final Clothes-Out)
Those are awesome! It never crossed my mind to put fabric in the printer!
Amy @MaisonDecor
Yes I love everything french too! Must be a virus...anyway I am following you now. Question: was your printer a jet ink printer or a laser printer....I love how your images came out. Also a fan of the graphics fairy! Put a coupld o f her images in my latest blog header...
A Pretty Pastime
You are such a clever crafter! That is going right on my "to do" list! Yours turned out absolutley gorgeous!
Katy
Maryann @ Domestically-Speaking
SO COOL!
Jeralee
GREAT post. You have some good ideas Gail that have inspired me to try some new things. Thanks for the links as well, I will have to check out those other blogs.
SandyQuilts
I use card stock and quilt spray adhesive and at last my printer is happy. I spray the card stock with the adhesive then place the fabric 1/8 inch below the top, hand feed and poof success.
Beth
Sandy, that's a really great idea -- thanks for posting it!
shannon i olson
very cool idea, hmmmm perhaps one should invest in a cheap garage sale printer so as to not feel too bad, in case something goes wrong. I love this idea!!
Angie @ The Country Chic Cottage
Love it!!
Ann Marie @ Twice Lovely
What a great idea!! I'm totally doing this!
Momma Button
Thanks for the tut! I've been wondering how to do this. P.S. I adore the graphics fairy!