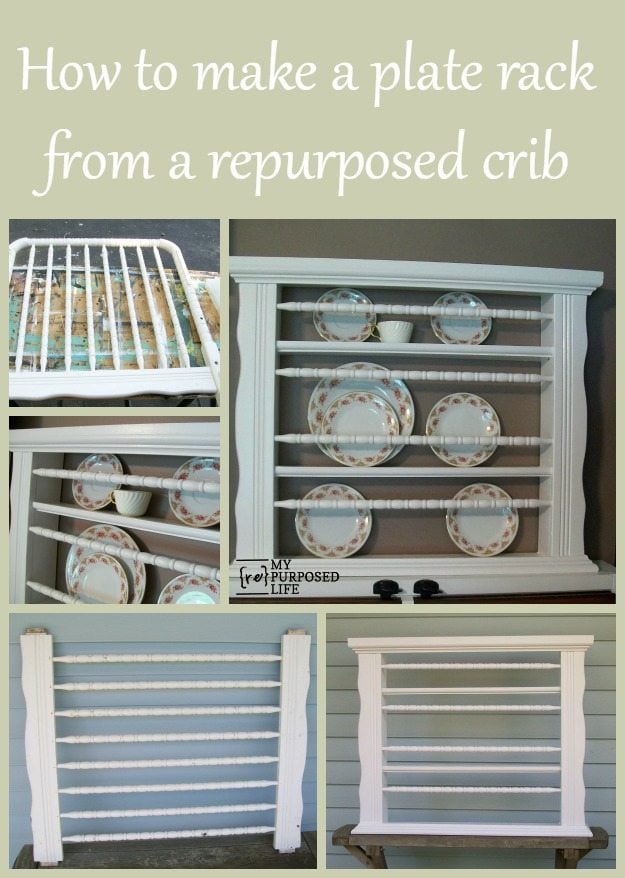
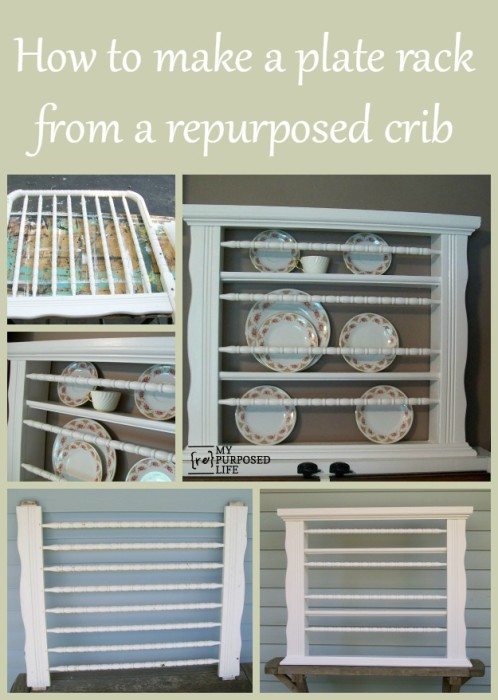
Today I'm going to show you how I turned a repurposed crib into a plate rack. I took apart some cribs and parted them out. After I took them apart I had a couple of the end pieces I swapped out. I turned them this way, and that way, almost standing on my head. I asked people who stopped by... "what does this look like" while holding up the pieces. No one was any help. Then one day it finally came to me what this crib part wanted to be! Here's the story:

Dismantle Crib
 I swapped them out, making two identical pieces.

Build a Box Frame for Repurposed Crib Rails


Add Trim


More Trim | Crown Molding


Sand Trim & Molding Smooth

")

Shoe Molding Holds Plates
")
Repurposed Crib Plate Rack

")
")
")
Add Plates to Repurposed Crib Plate Rack Display

")
")
")


More wooden spindle projects here
see more bits and pieces projects here
Gail Wilson is the author and mastermind behind My Repurposed Life. She is obsessed with finding potential in unexpected places and believes that with a little hard work and imagination, any old thing can be made useful again, including herself!
Gail reinvented herself during a midlife crisis and has found purpose again. She hopes you will find new ideas for old things and pick up a few tools along the way.
Katie Sue
That is so cute.I found you through google images. I'm a new follower.
I love what you did!
Katie
Inspire Me Heather
Hello Gail! I just had to link this to my plate racks post today - you rock girl!
Contact:
Wow you are so imaginative! Thanks for all the inspiration!
Cousin B
You are my idol!!
Delcie
Love how you repurposed something. Hubby and I are working on making a plate rack from a vintage change table.
Laurel @ Ducks in a Row
Pretty amazing - I love the plates you have, also.
Hot Foil Designs
Oh so Clever!
Lee Laurie
Amazing! I am so doing that! I have been needing a plate rack! I have some old baby bed parts in storage that have been waiting to be used! Thank you!
Hugs,
Lee Laurie
Shannon @ Posh Pieces
I love how this turned out. I just posted something last week about plate racks, because I am dying to make one myself. Don't tempt me to take apart my sons crib! 🙂 lol!
Granny J
I've finally decided that you can make anything. So can I put in my order for a four pin rolling pin rack? LOL
I love that plate rack. I'd have never known it was made from a crib. I swear you're amazing at repurposing items.
Sandy
Very interesting idea... I'm sending this to my daughter.. her 3rd boy is graduating to a 'big boy bed' soon and I thought she might use the bars, standing on end, as book racks for her homeschool class room... somehow she can use your idea for this??
Nice!
Katie
Wow, that turned out beautiful!! And I love that you can see the wall color through the back -- makes the plates pop!
Jan @ bobbypins boardwalk
I'm in awe. Gail, you are so talented. Really such creativity is amazing. Beautiful pieces!
Pam
Love the plate rack!! Nice job. And of course the fireplace is just fantastic. Thanks for stopping by the blog and wanting to have me as one of your feature followers. Awesome.....
Jody
Love that plate rack! You are so talented, I would never have dreamed of doing that! Wonderful job!