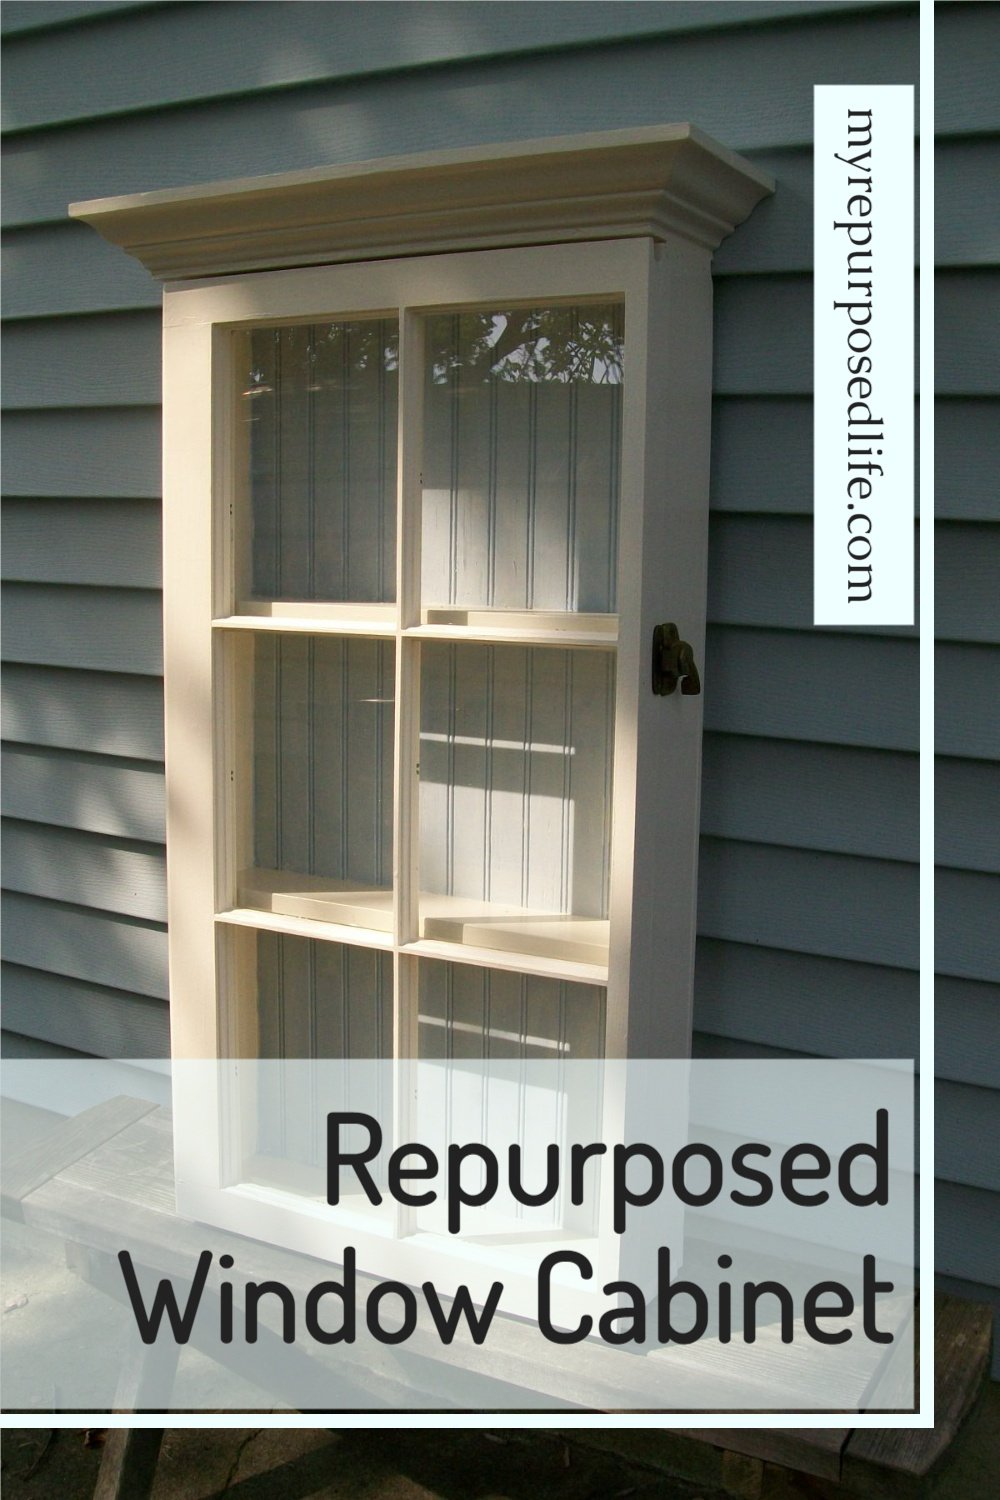
I love making projects using reclaimed windows, this repurposed window cabinet was put together with mostly scrap bits and pieces.
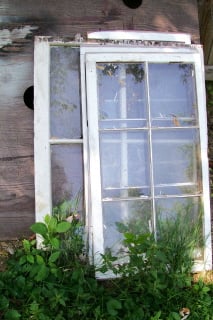
When I got these windows, they were a little too new looking to suit me. I decided to store them outside so that they would get weathered.
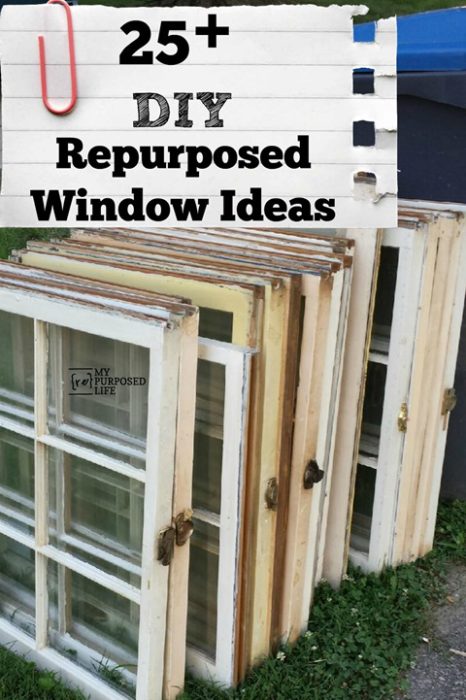
Start with a reclaimed window
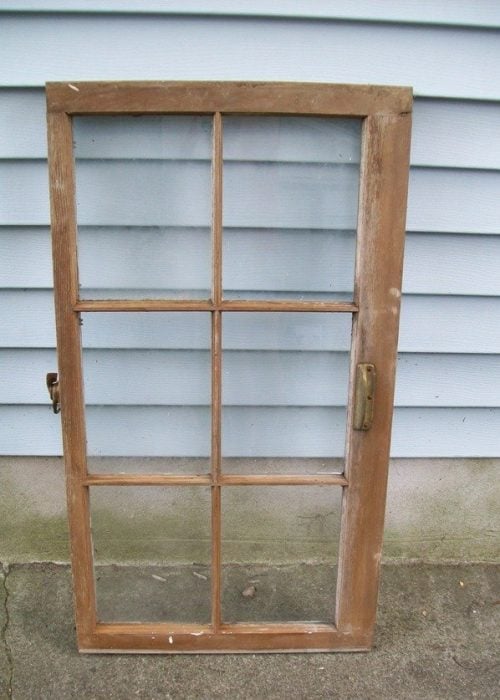
This is the window I chose for this project.
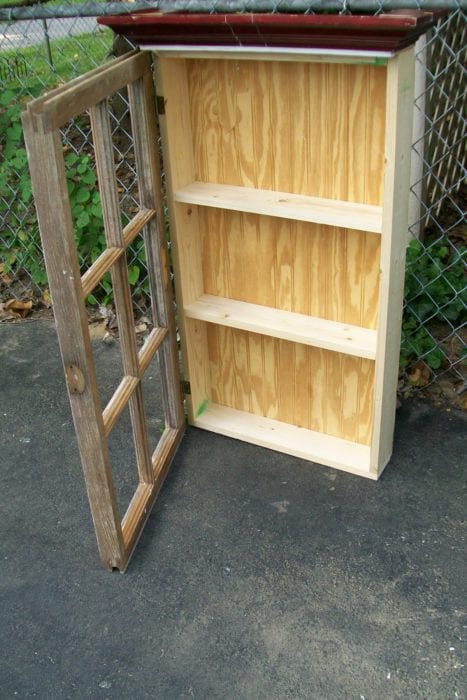
Construct a simple wooden frame box
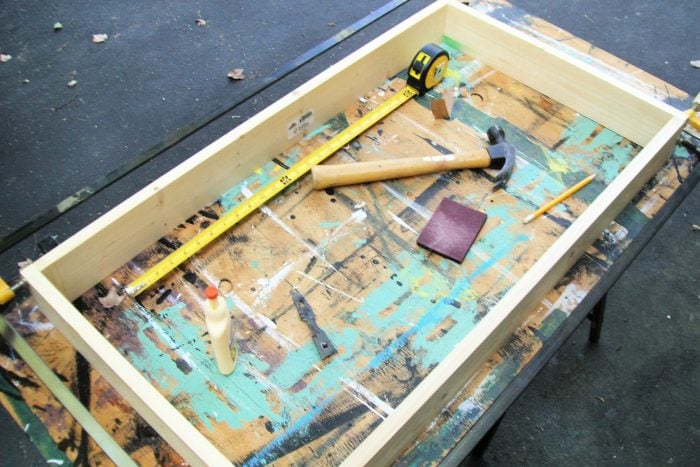
I used pine boards to make a box for my cabinet. I use a lot of reclaimed lumber, but in this case I used new lumber. You can see that I have it clamped. I used Gorilla Wood Glue and my nail gun.
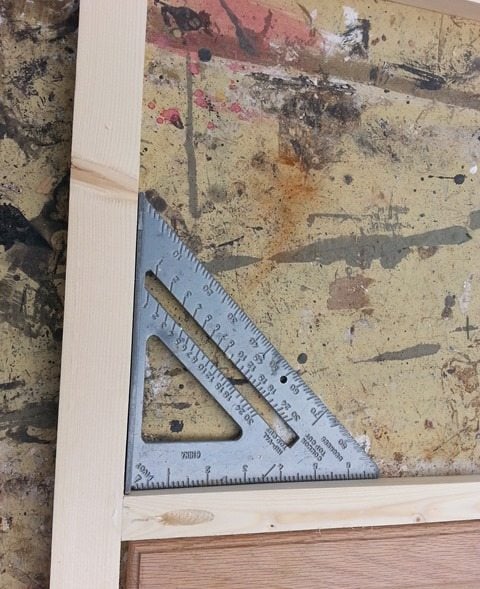
I added 2 shelves. Look closely and you can see that I use a speed square. 🙂 I glued, nailed and clamped the shelves.
Add bead board to back of reclaimed window cabinet
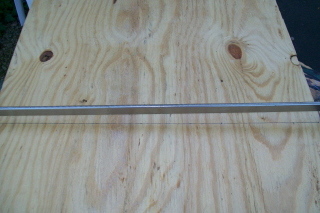
I added a piece of bead board to the back. Again, I glued and nailed this in place around all the edges. I put my clamp across showing the placement of the shelves. I drew a line with my carpenter's pencil to show where I should place my nails to secure the shelves.
How to transform a wooden shelf into cabinet molding trim
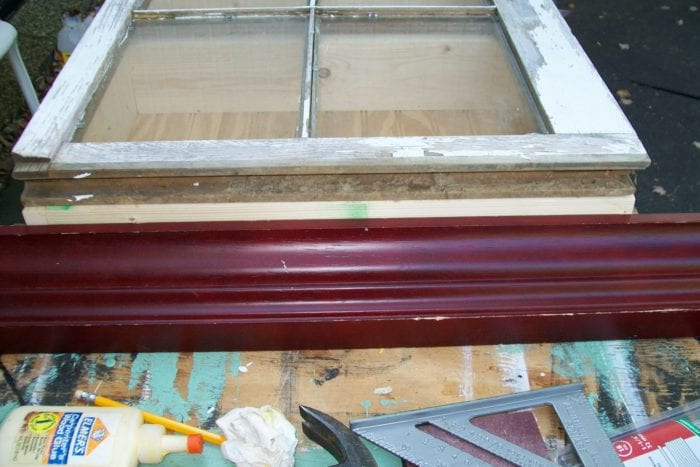
See this small shelf? Can you see how I intend to use it? As trim for the top of my cabinet. I used it as faux crown molding!
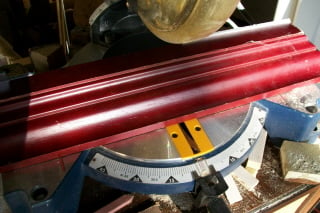
It was too long, so I cut it down on my miter saw. But! The tricky part is, you can't cut the ends off. You have to cut it in the middle.
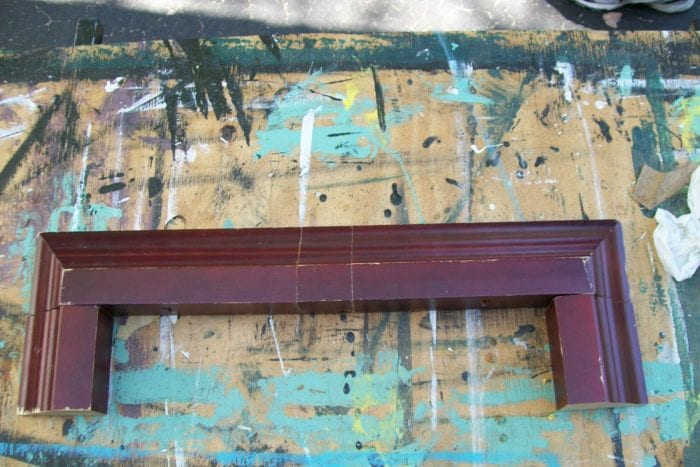
OOPS! I had it laying the wrong way when I measured it, so it ended up being too short, so I had to add a piece in the center. Can you see now why you can't cut off the ends? Those 2 pieces laying separate are part of the shelf that I cut out of the middle... they have a special job to do too.
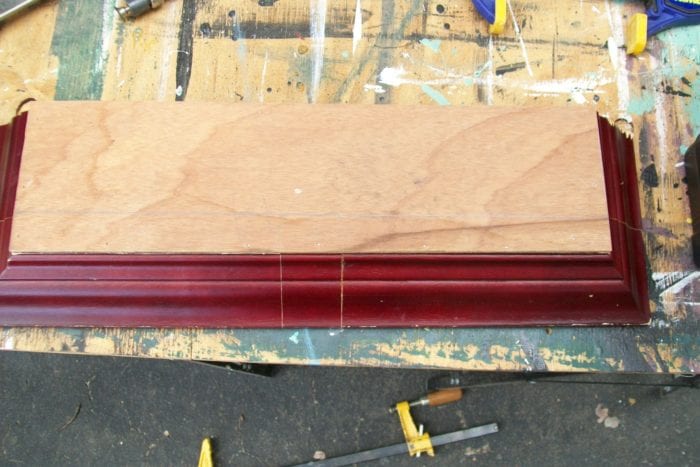
They become the sides of my top piece. To firm everything up (because of all the chopped up cuts) I added a piece of thin plywood.
The reclaimed window cabinet is nearly finished
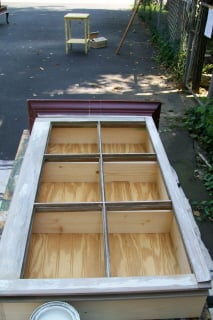
This is the cabinet taking shape. The piece of luan is glued and nailed to the top of the cabinet. I actually had the window on with the original outside of the window facing out. I even had the hinges on it. But, I changed my mind and decided to flip the window over.
This picture shows the window before I switched it.
Putty Patch and Paint
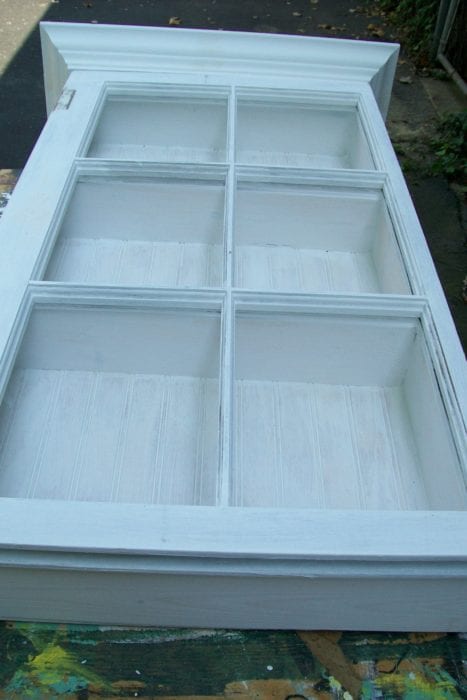
So I puttied the holes from the hinges, and trimmed the side some to make if fit properly. (at this point, I had the glass out of the window, so I trimmed the window on my table saw) I had decided to take the glass out, to make it easier to paint. I would not have used the table saw on this window with the glass attached. Here you can see that the right hand side is now more narrow (after I used the table saw)
I used spackling to cover up my oops on the trim.
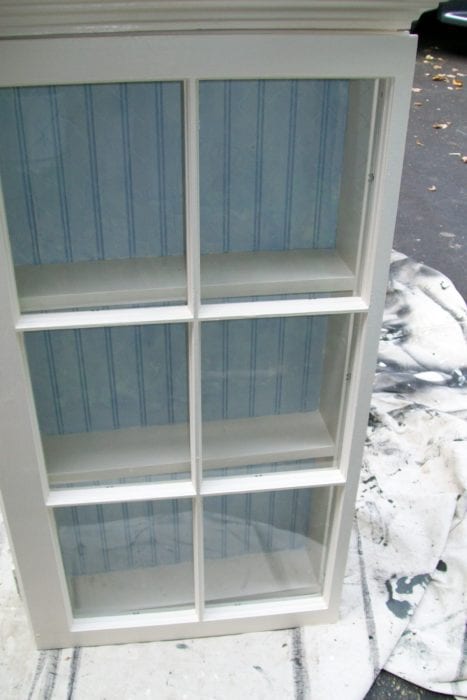
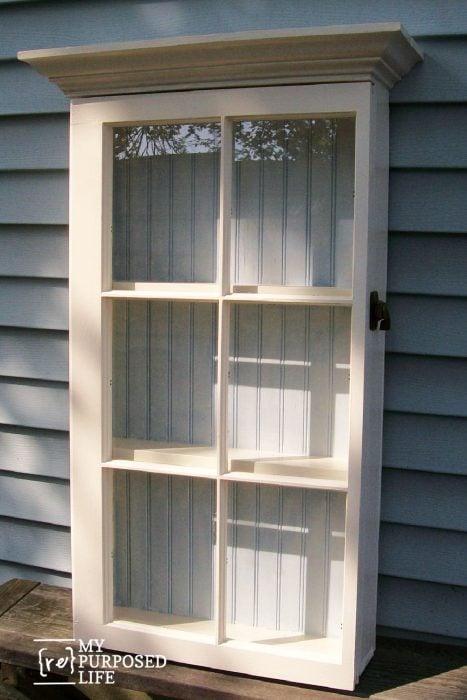
This picture shows that I painted it Heirloom white with a very pale blue on the bead board. I only had a medium blue, but I tinted it with the heirloom white to lighten it.

Pretty Window Cabinet

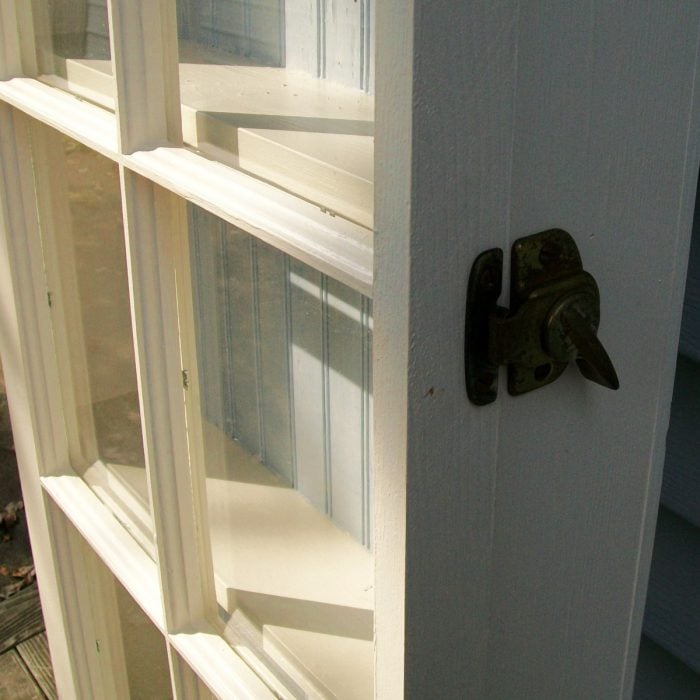
Ta Da! It's done! I used the original window hardware to make a latch.
gail
Gail Wilson is the author and mastermind behind My Repurposed Life. She is obsessed with finding potential in unexpected places and believes that with a little hard work and imagination, any old thing can be made useful again, including herself!
Gail reinvented herself during a midlife crisis and has found purpose again. She hopes you will find new ideas for old things and pick up a few tools along the way.
Debbie Perkins
Just what I want!!! I just want it deep enough for plates. I have several windows that are screaming “pick me!” Thanks for the tips! I’m ready to go. My husband thought that I was nuts when I started buying power tools. I just need a shop! I have a sewing room, but a place for MY tools. Thanks for the idea.
Gail Wilson
How fun that you found me! I'm so happy my tips will help you. I don't really have a shop either. I store my tools in the garage, but pull out a work table into the driveway when I need to work on something.
Wishing you happy DIY'ing!
gail
Rose Marie Haeni
Was it you that at one time printed out the idea of a coffee pot changed into a lamp base?
I have my mother's, beautiful, Mirromatic percolator also yet, and would like to DIY and get to
work!!!
Could I please have the instructions again?
AWESOME!! ALL THAT YOU DO!
THANKS!!!
gail@myrepurposedlife.com
yep, that was me! If ever you need to find something just google My Repurposed Life Coffee Pot (or whatever you're looking for) and you will probably see it come up in the search. 🙂
https://www.myrepurposedlife.com/2011/07/vintage-coffee-pot-lamp-repurposed.html
Terry
I am totally impressed with the piece that you have created in the pictures, excellent job. I recently acquired a larger circa 1800 window pane that has 32 window panes of glass in it. The overall size is 6 feet wide x 8 feet long. I am going to carefully remove all of the glass , remove the putty and glazier points, strip it down and hand sand it back to the bare wood. I will than install 32 individual pieces of bronze antique mirror , put a back on it and hang it in our home. It is amazing what one can do with these old window frames and a little creativity such as you have done . Keep up the great work.
Terry
Di B
I love everything you make. These window cabinets are just ONE of my favorite items you create.
Joanne
absolutely love your work and your ideas. do you have any ideas for a metal head board and foot board? thanks
gail@myrepurposedlife.net
Joanne,
I have done one bench with a metal headboard. It was a long time ago, but it was made similar to this one: http://www.myrepurposedlife.net/2009/09/brown-twin-spool-bed-repurposed-into.html
I prefer working with wood beds.
good luck have fun!
gail
Cj
Howdy,
That tool is called a Speed Square 😉 .. Awwsum Project!!!! Thanks fer tha ideas.
GOD BLESS SWEETLY,
Cj.
Roman
Nice!
Anonymous
If you can build something that looks like this, I especially love it that you call it a triangle square thing. You go girl. I bet there are a lot of people out there that have the lingo for the tools and no cabinet to prove they can use em.
Becky Reep
Love your cabinet and it turned out really nice. Even after you had a problem with the cutting of the one piece, you kept going...that was good! Good inspiration!!
Deborah March
Absolutely positively SPECTACULAR cabinet!! You make it look so EASY. Thanks so much for the great tutorial!
Frugal Home Designs
There isn't much to stay, execept this is AMAZING!!! What great vision and follow through. Thank you for coming to the party and inspiring me. Your work is wonderful.
Cyndi
I just saw this on your blog. I am repurposing a homemade gun cabinet that, according to the picture in my head, will be almost identical! Thanks for the visual.
Miki
I can't believe it has taken me so long to find this! This is exactly what I want to do with some very large windows I bought off of craigslist. Trying to explain it to people is difficult and here you are with the very thing I've been looking for! Thank you, you did an awesome job!
Heather
I love this idea! Our daughter needs something in her bathroom, but everything we have found is too deep! I never thought about building a shallow box and using a window for a door! Thanks for the inspiration ... now if only I had some tools!
Chari
Hi Gail...
Ohhh my...I just love this project, my friend! What a fabulous way to repurpose those old windows! I have really enjoyed all of your "repurposing window" ideas...especially since I have a bunch that I've been wondering what I could do with them! Girl, you are soooo clever and creative...I would have never thought to use one of those wall shelves for crown moulding! It really was the "icing on the cake" to your beautiful shelf! Now...I also have to mention that I am so impressed by your carpentry skills...you're awesome, Gail!!! Sooo...now I'm curious where you have put this beautiful window shelf and what you are displaying in it??? Inquiring minds want to know...hehe!
My friend, I just loved this post and I'm so happy that you chose to share it with us today for Sunday Favorites!!! Thank you!!! It's a fabulous idea and I missed it the first time around!
I hope that you're having a super Sunday!
Warmest wishes and Christmas blessings to you and your family, Darlin'!
Chari @Happy To Design
Keetha Broyles
Oh my! It is absolutely LOVELY!!! I think I need to see about getting one made for ME!!
Alicia
Beautiful! I bet it looks great decorated with lots of Christmas goodies.
Diann
What a great makeover and redo!! Loved it. Beautiful job!
Have a wonderful Christmas!!
Sam
WOW! I would have never thought of doing that with an old window. I love it!
Tricia Anne
I have three old windows that I keep looking at and wondering what to transform them into. I am definitely keeping your tutorial handy! Thank you so much for posting your creation. It is fabulous!
Sincerely ~ Tricia Anne
Room to Inspire
Love it! Seriously...love it!
Chelsea
Shanty 2 Chic
Thanks for linking this up and I will AGAIN say how much I LOOOOVE it!! Way to go!!
~Whitney
Shanty 2 Chic
I just love this and your tutorial is great! I love old windows and I have never seen them used for this! Great job and thanks so much for linking up with us tonight! ~Ashley
Infarrantly Creative
Be still my heart I am in love. I will be in our neck of the woods this weekend running a race. I am an Indy girl and I think I see a road trip in my future. I want to learn how to do that and I have plenty of windows to do it.
Traci @ Beneath My Heart
Oh my gosh! I LOVE this! You are so very talented.
Great job!
Blessings,
Traci
Sharlotte
I love this! The beadboard and colors are fantastic!
niartist
Can I say, WOWOWOWOWOWWWO! This is fantastic! I love it, and it's the most perfect transformation! I can't tell you all the windows like this I've seen on the street and passed up! You've got me thinking now! Thanks for sharing, and inspiring!
nannykim at spindle cottage
Really CUTE!! But soooooo much work!!YIKERS
cindy@cottage instincts
Girl, you are one amazing craftswoman! Just beautiful...
peace, cindy
(ps...I'm having my first giveaway, so pop on over when you can!)
Ashley @ AshleysBusy
Wow! This is great. Wonderful carpentry skills. Looks totally professional. 🙂 Can't wait to see it filled up all pretty in your home 🙂
Mrs. P.
Oh, this is great!! I love the result.
Blessings!
Gail
claudie
No I see your from Kentucky... Interesting add...from Canada on your website..??????? i'm baffled.
Oh well
Claudie
claudie
Now THAT is the best transformation today.
LOVE IT.
You are great at carpentry and it shows.
Happy MET Monday
Love Claudie
xoxo
P.S. Are you in Canada, I am...I see an add for Roger's here.?
Sheri
My word but your good at stuff like this!!!
I have a linky party going on, come on over and link up! http://theshadesofpink.blogspot.com/2009/10/room-month-great-pumpkin.html
Mimi
Talk about a transformation...oh, to be so creative...I love that cupboard!
Really Rainey
Fantastic cabinet! Its not an easy project that's for sure! You are very talented!
Have Fun~Happy Fall...
~Really Rainey
Andrea Padilla
You are amazing!
Misti of Studio M Designs
So funny, I was just giving someone advice on what to do with an old window, and I told her to make it into a cabinet. I just sent her this link! Thanks for your fabulous post!
~Misti
Shirley
This is just amazing to me! Did you do this all yourself? I've got to be braver about tackling bigger jobs myself!!
Kelee
Hi! Great job!
The cabinet is lovely and functional!
Stop by....
Your blog is really inspiring!
love, kelee
Junk Mammas
Love this!!! When I read hooked on Junk, I knew I needed to check your blog out.
Barb
Wonderful!!!
thanks for sharing
blessings
Barbara jean
ImagineCozy
That turned out so great! I would not have thought to turn it into a cabinet.
-Angela
Jessica
It's beautiful! I'm definitely going to be checking out the rest of your blog.
LITTLE STAR
Love it - you make it look so easy!
Cristin
I love old windows too! You are super creative.
the queen
Are you for hire? Great job. I love the color you picked.
Susan Fairchild
beautiful! I'd love to try this sometime!
(and btw - the tool is called a 'speed square' and is a VERY handy tool for many projects - I think we own two!)
Frippery
Gorgeous. I love the re use of the shelf. You are one creative chick!!!
Terry
It's beautiful and one of a kind. The crown molding puts it over the top.
Porch Days
Wow, I'm impressed. Wish I could do all that woodworking. I have the ideas but not the know how.
rosecottagegardensandfarm
Fabulous! Can you come and make me one now?!
Wonderful cabinet!
Debbykay @ Rose Cottage Gardens and Farm
I Play Outside The Box
That is just fabulous!!
Vintage Junky
That is great! I want it too!
SMiles!
Michelle
Ana~A Petite Cottage
Hi Gail,
Can I have it?! 😀 Wow, it turned out great. I am blown away, you did an awesome job. I'm going to have to keep my eye on you...I might learn a thing or two from you. Thanks for sharing and thank you for stopping by at A Petite Cottage. Drop on by again anytime.
Smiles,
♥Ana
Kathy
You did a beautiful job on this! I've been wanting to make one (or more) of these out of the old window sashes we've been taking out as we remodel our home. Now I have visual evidence for DH that it can be done! Thank you so much and keep up the GREAT work that you do!
bj
Wow..this looks great..
Glad to have found your blog..I am going to follow so I won't lose you. :O)
Come by and visit when you can...
bj
Gina @ The Shabby Chic Cottage
Gorgeous! I've still got a stack of those windows left and this would be a perfect project to use them. Great job!
(Stop by tomorrow, you're gonna be a Diva!)
Robin
Wow! You did an amazing job.
LADY BEVERLY
I accidently found your blog - I can't remember now how because I am very, very overwhelmed in a good way - this is wonderful! I love what you do and especially love this cabinet. Many years ago I found a dresser out on the curb and we took it, I stripped it and my husband replaced a side panel. I think it is my favorite piece of furniture in our dining room.
I really makes you feel good to do this stuff.
Thanks for sharing!
Beverly
abnsigoslady
You are a genious. I love this idea. Laura@the mansion
Mandy
I want one!
Such a cool project. I'm going to try to copy you...someday...maybe.
Lilia
Oh how I wish you were my neighbor! We would have so much fun, me watch while you create, lol. Love it, love it, love it. Hey did I tell you that I love it?? You're awsome, glad I found you.
Let it Shine
It looks awesome! Great idea, and great job building it!!
Alyshia
Shanty 2 Chic
LOVE this!!! Thanks for the tips and details... its AMAZING!
~Whitney
rosemst2t
Wow! Nice job on that Gail! And I'm coveting those awesome clamps you have there. Had to laugh about the oops cut, thought I was the only one who did that.
Question, how did you get the glass out without breaking it? I've never managed to do that. Please share your secret!
Rose
The DIY Show Off
Oh my gosh! I LOVE that! Great job. I have old windows but they aren't that pretty. 🙁 But I'll be keeping my eyes open!
Thanks so much for sharing!
Roeshel
Anne~fiona and twig
Wonderful! My Habitat for Humanity Re-Store has tons of old windows and doors, I'd love to try this. Thanks for always providing step-by-step tutorials that even someone like me could follow!
~ Anne
Embellished Bayou
Fabulous! So creative, I love it!
Leanne
Wow! That looks amazing. I love it! You did such a great job. Thanks for sharing.